Everything the app does, in plain steps — from your first setup to recovering your account. Use the search box to jump straight to a feature.
1
Getting started
Install the app, create your account, and lock it down.
Download & install the app
Time Release Safes is a free download. You only pay if you choose a larger plan later.
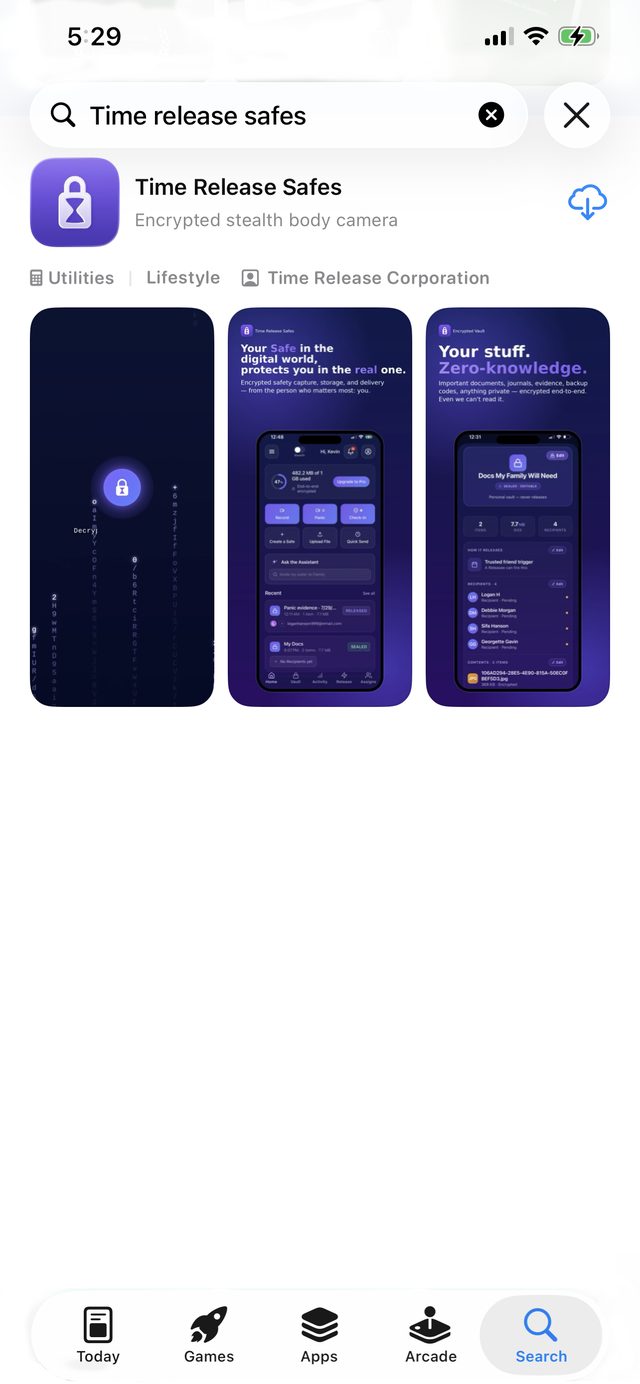
On iPhone, open the App Store and search “Time Release Safes,” or tap the App Store badge at timereleasesafes.com.
Tap Get and let it install.
On Android, open Google Play and search “Time Release Safes,” or tap the Google Play badge at timereleasesafes.com.
The App Store listing — tap Get and you’re on your way.
Create your account
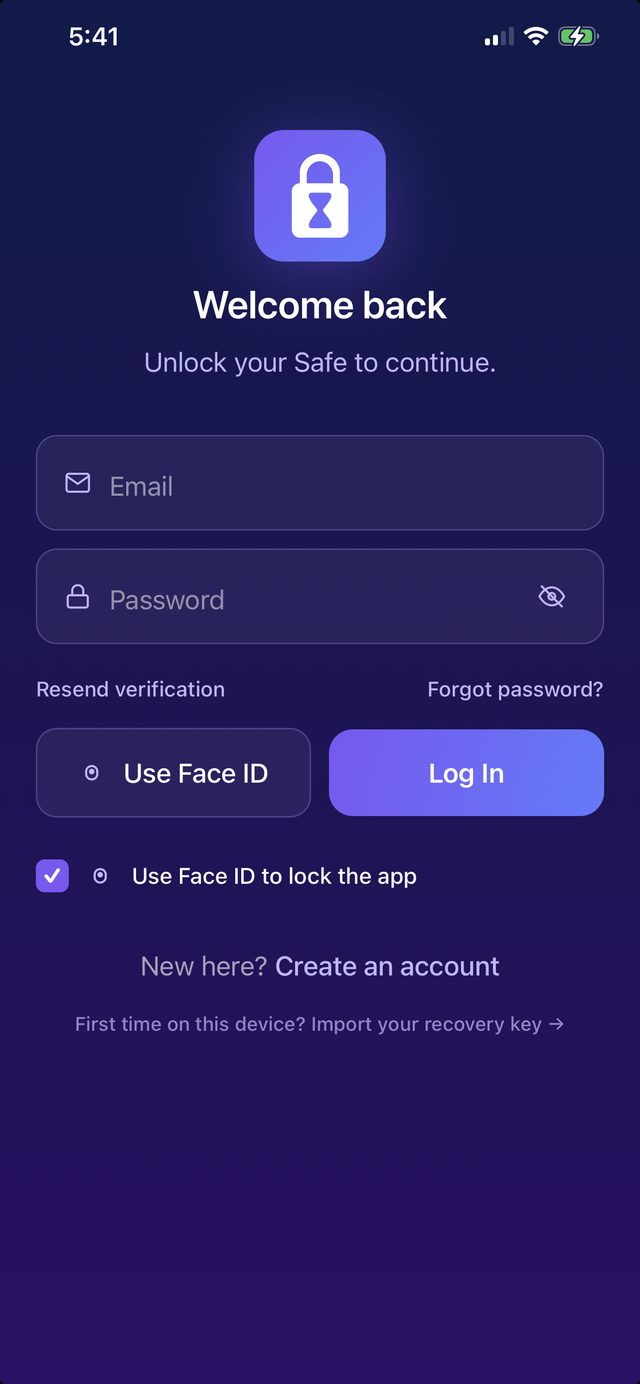
Open the app and tap Create account.
Enter your email and create a strong password.
Read and accept the Terms of Use and Privacy Policy (tick the box).
Tap Create account and verify your email if prompted.
Create your account with just an email and a strong password.
Save your Recovery Phrase
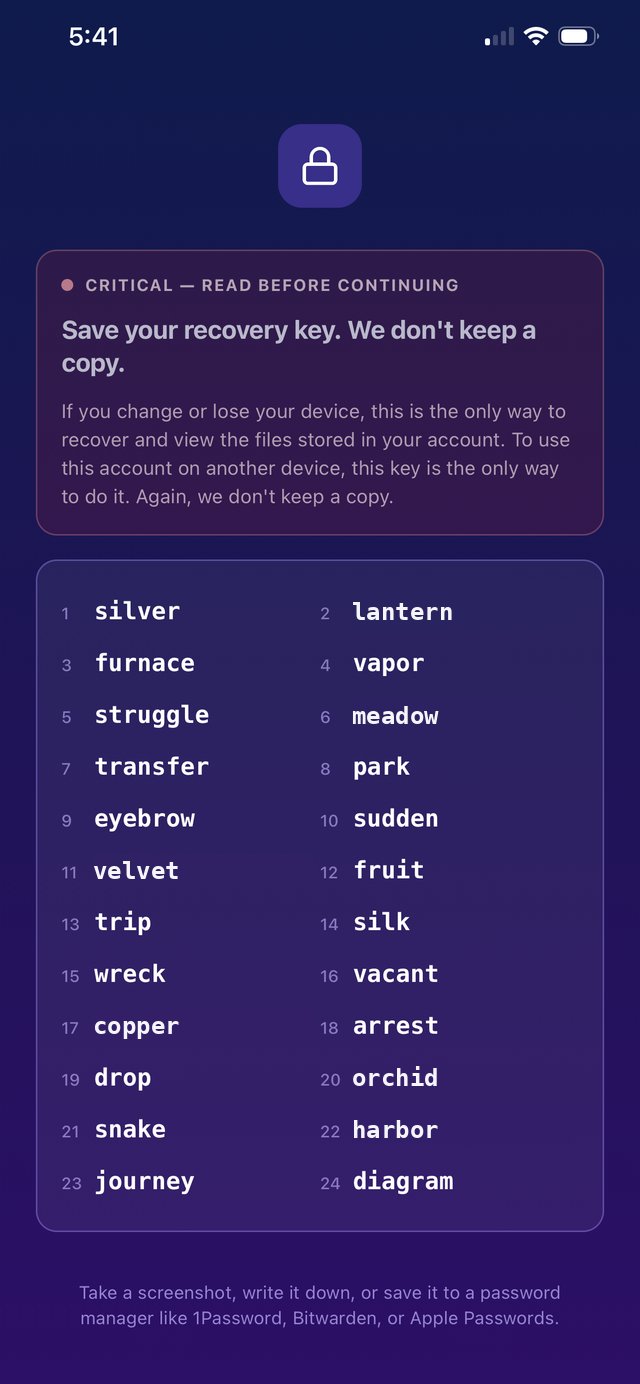
Your Safes are encrypted with keys that only you hold. Your Recovery Phrase is the master way back into your account.
On the recovery screen, tap Reveal phrase.
Write the words down in order, on paper — don’t screenshot them.
Confirm the phrase when the app asks you to re-enter it.
Store it somewhere safe and separate from your phone.
Note: TRS cannot recover this for you. If you lose your phone and your phrase, and you haven’t set up Designees, your encrypted content can’t be opened.
Your 24-word recovery key. (The words shown are a sample — never share your real key with anyone.)
Turn on Face ID / biometric unlock
Go to Settings → Security.
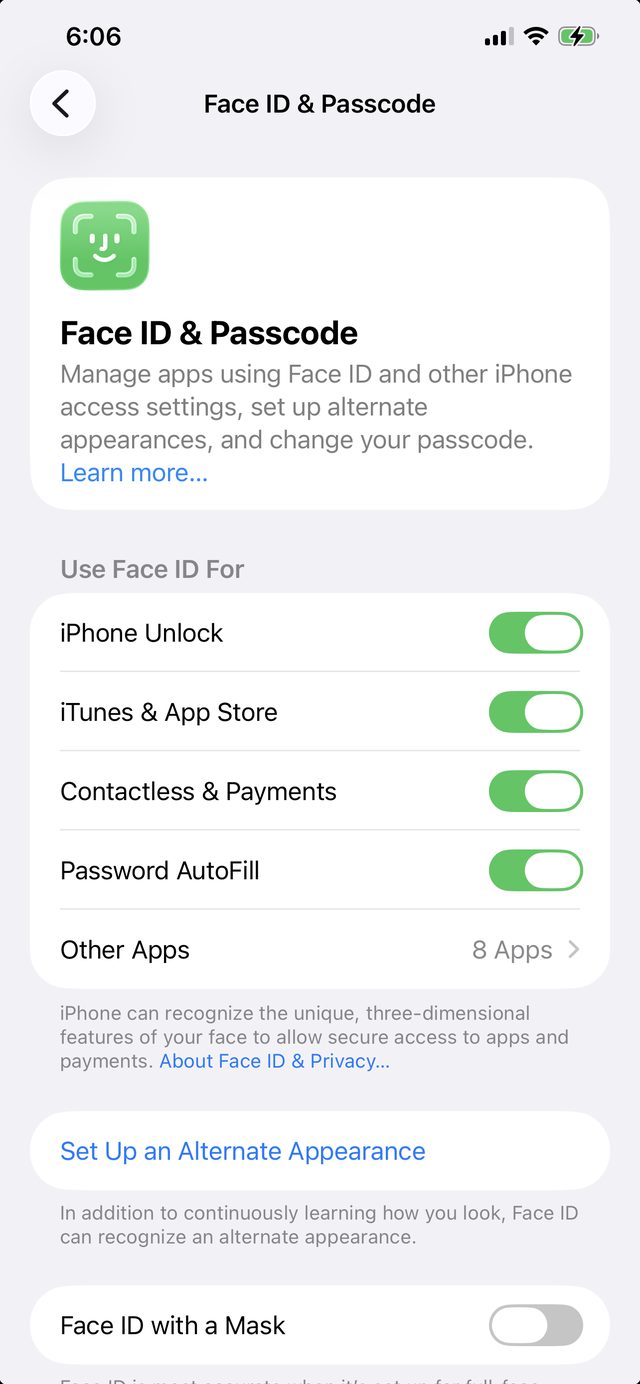
Toggle Face ID (or Touch ID) on.
Confirm with a scan. The app now locks behind your biometrics.
Approve the Face ID prompt and the app locks behind your face.
Take the home-screen tour
Almost everything lives behind three buttons and a menu:
Check-in — a quiet heads-up to your trusted circle.
Record — start an encrypted recording into a Safe.
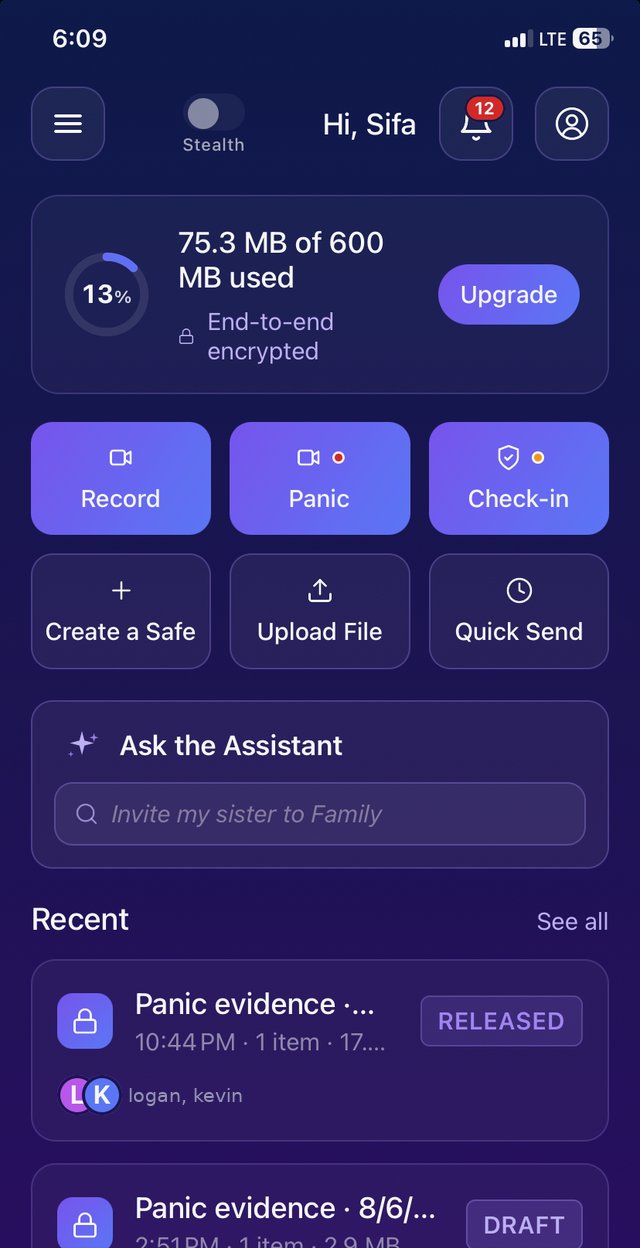
Panic — capture evidence and release it to the people you named.
Menu — your Safes, your Circle, and Settings.
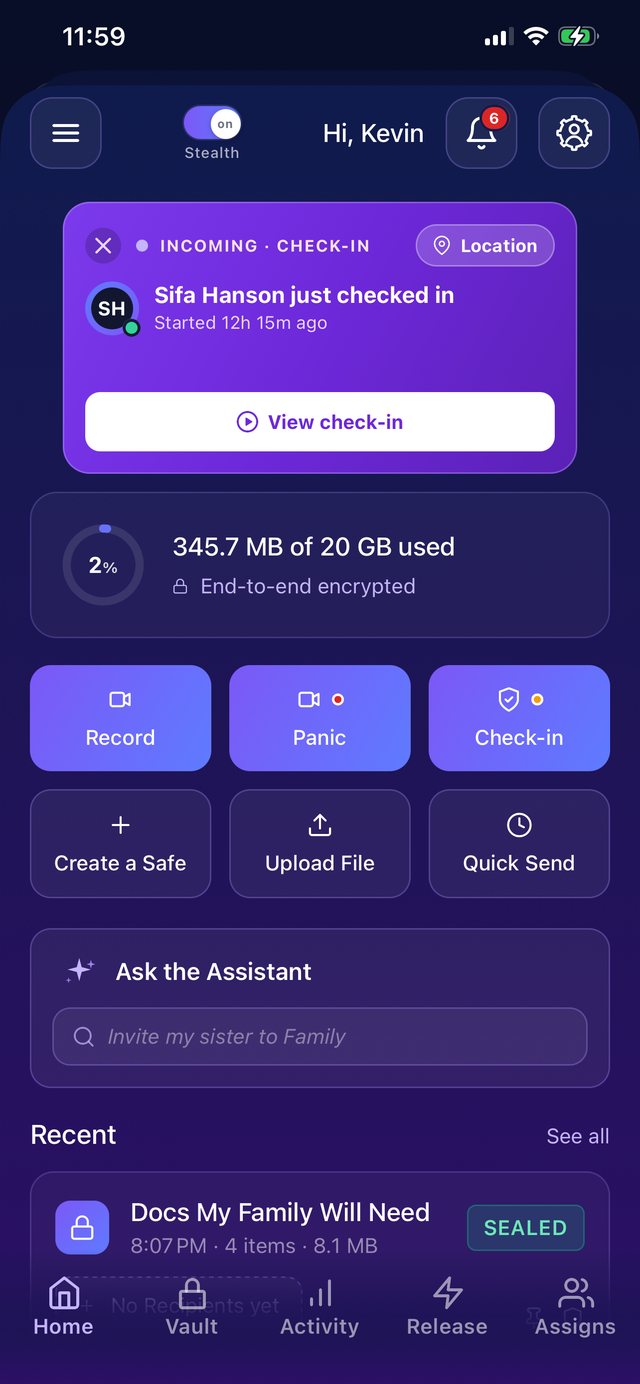
Home base: Record, Panic, Check-in up top — everything else one tap below.
2
Finish your safety setup
Do these once so the app runs clean when it matters most.
Grant app permissions (so capture runs clean)
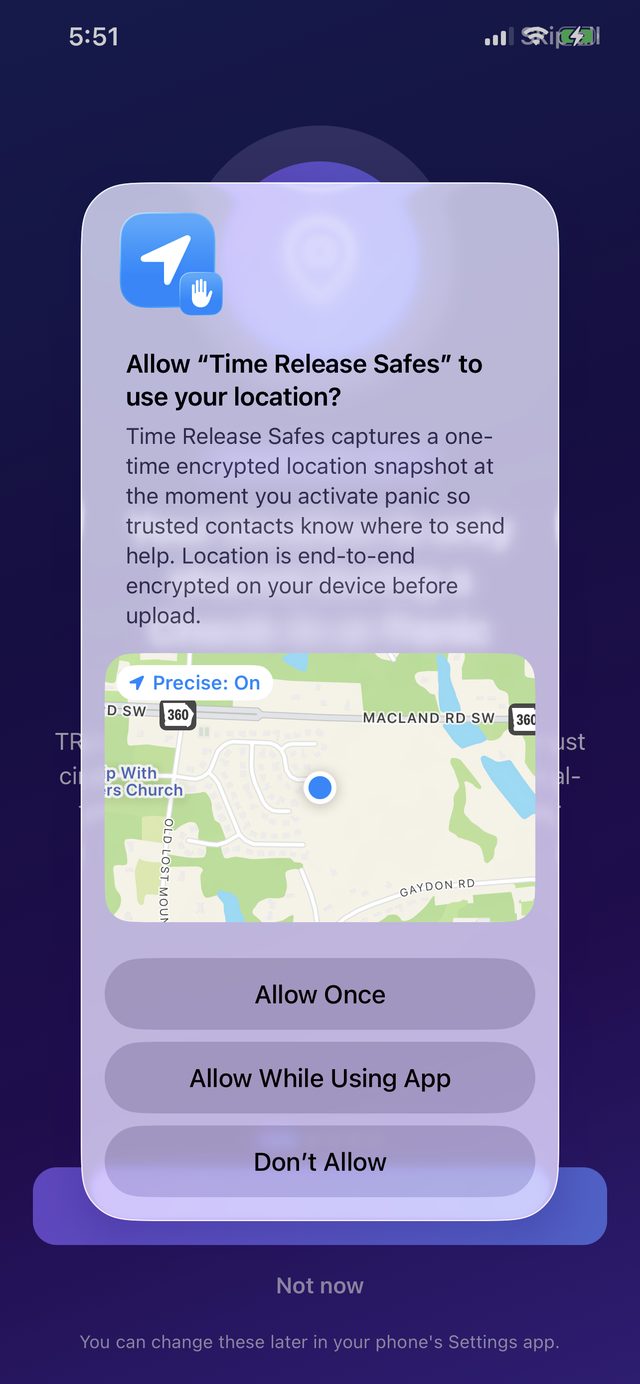
If you skipped any permission during onboarding, Panic and Record can’t capture cleanly. Turn these on so evidence records in full.
Open Settings → Permissions in the app (or your phone’s Settings → Time Release Safes).
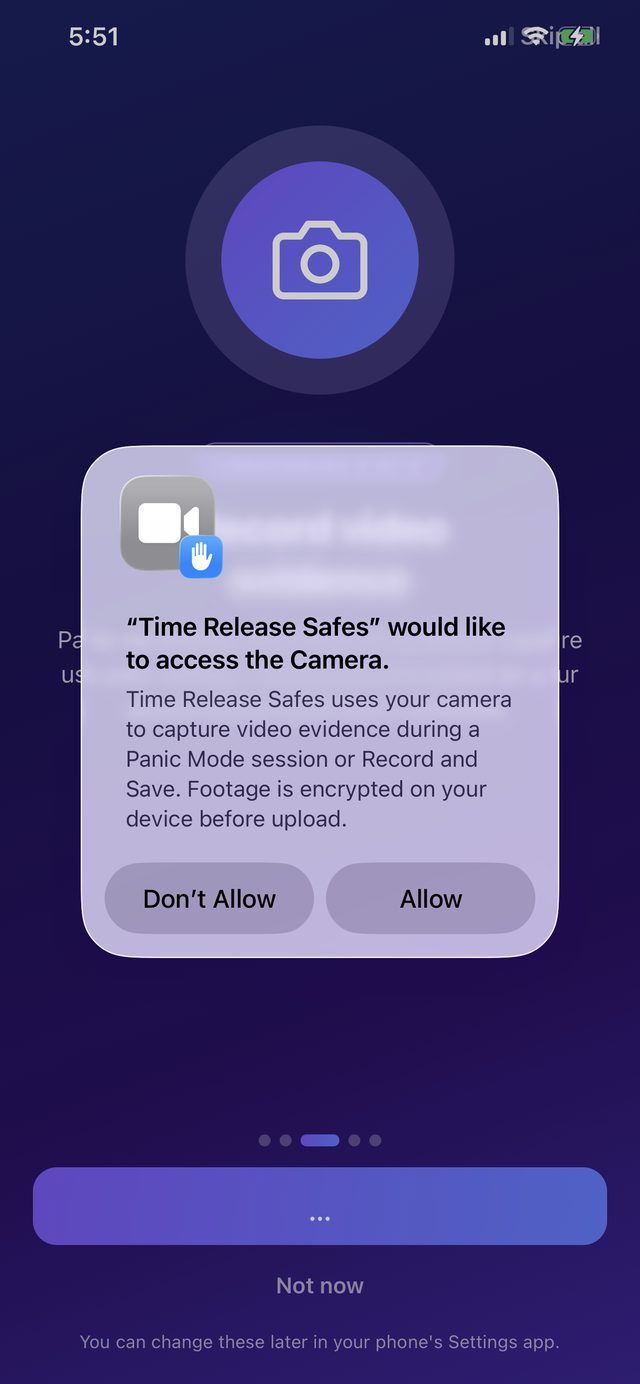
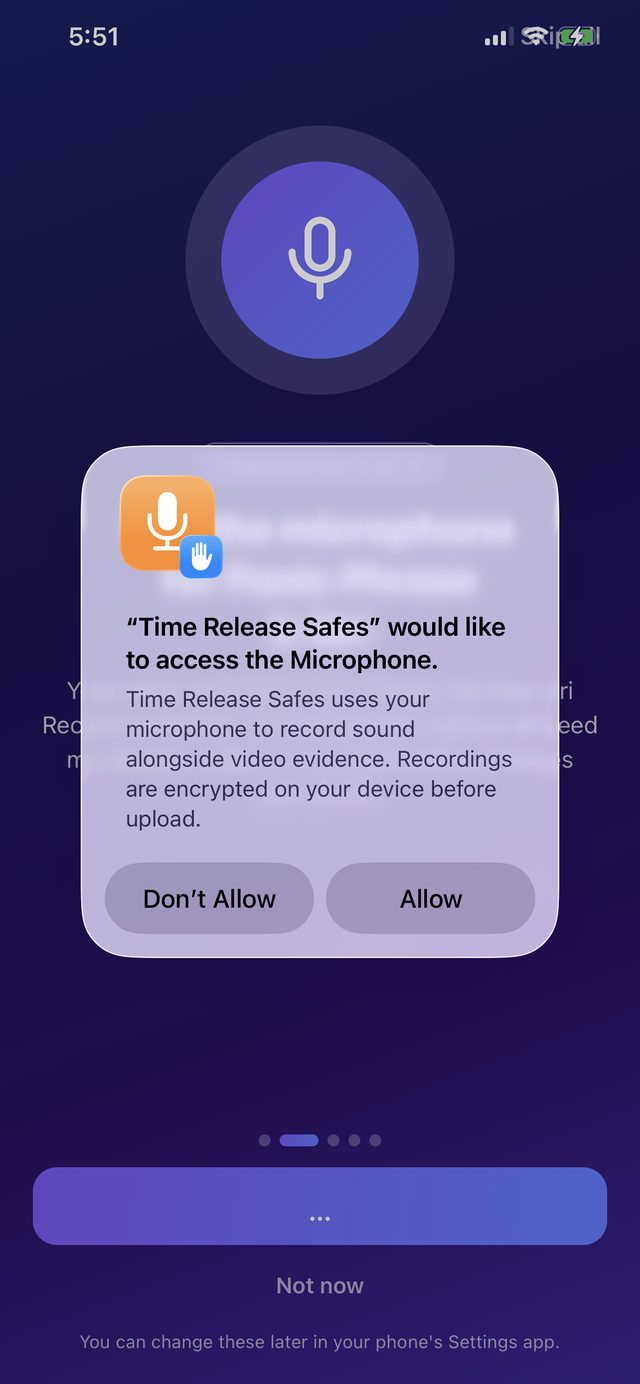
Allow Camera and Microphone — required to capture video and audio evidence.
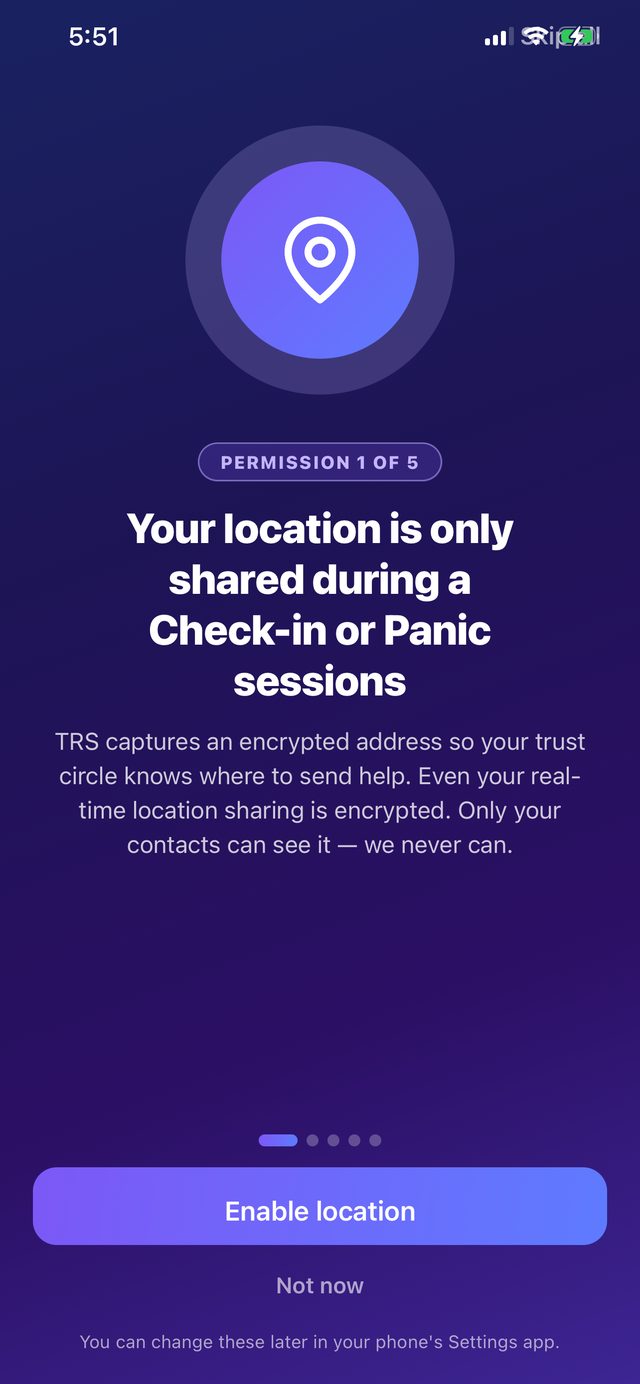
Allow Location (“While Using” or “Always,” your choice) so captures are geotagged.
Allow Notifications so release alerts and check-in reminders reach you.
Note: Without Camera and Microphone access, Record and Panic cannot capture video or audio. This is the single most important setup step.
Approve each prompt as it appears — Camera and Microphone are what let Panic and Record capture real evidence.
Set your Check-in recipients
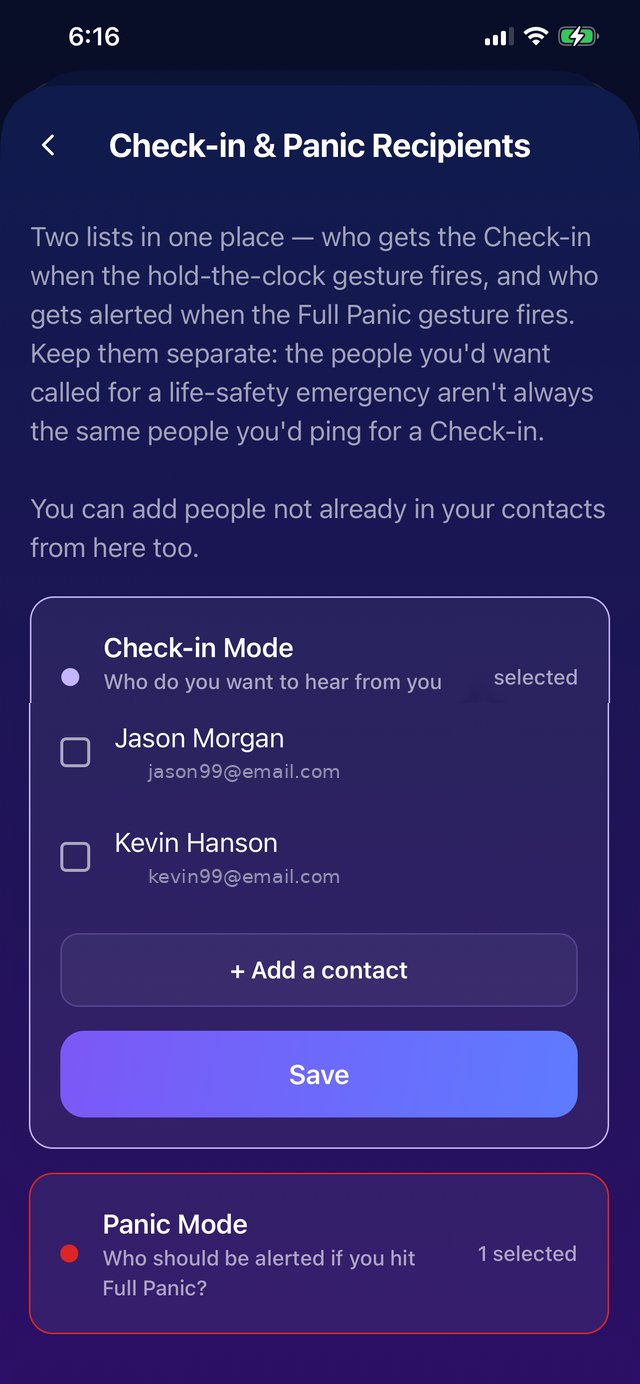
These are the people who get a heads-up when you tap Check-in.
Go to Settings → Safety → Check-in recipients.
Add your small trusted circle by contact, email, or phone.
Save. They’ll only ever be notified when you actually check in.
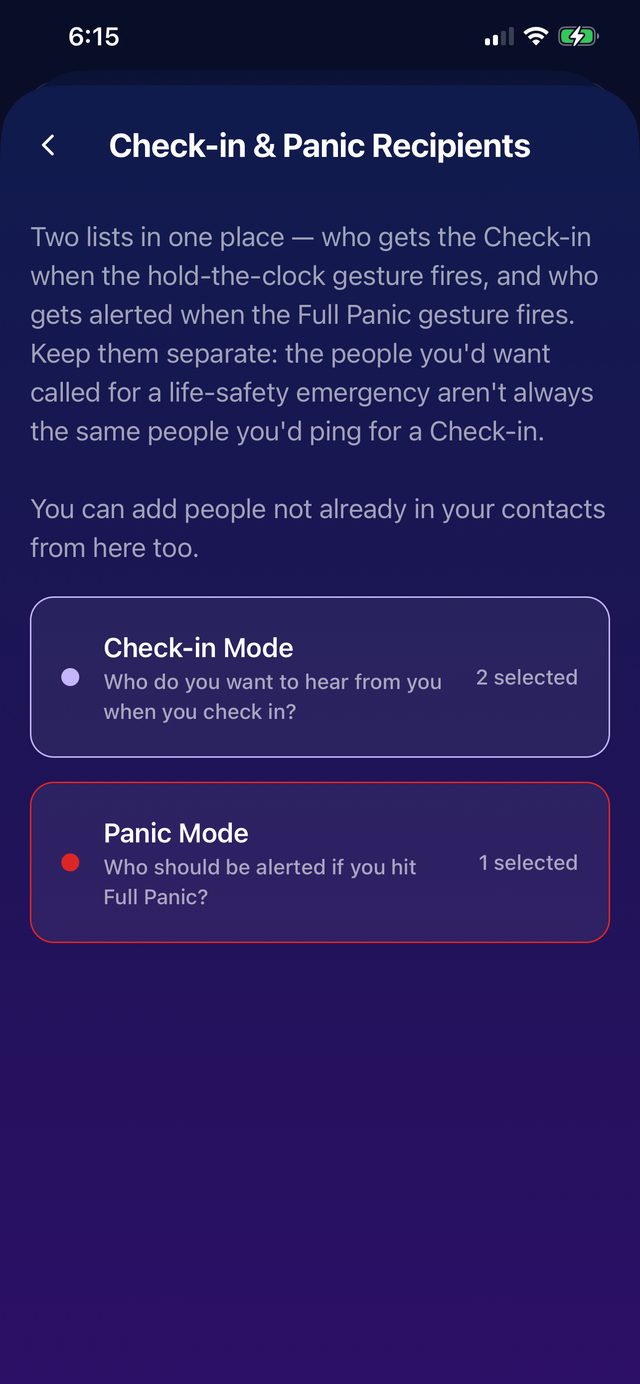
Two lists in one place: who hears from you on a Check-in, and who gets alerted on a Full Panic.
Set your Panic recipients
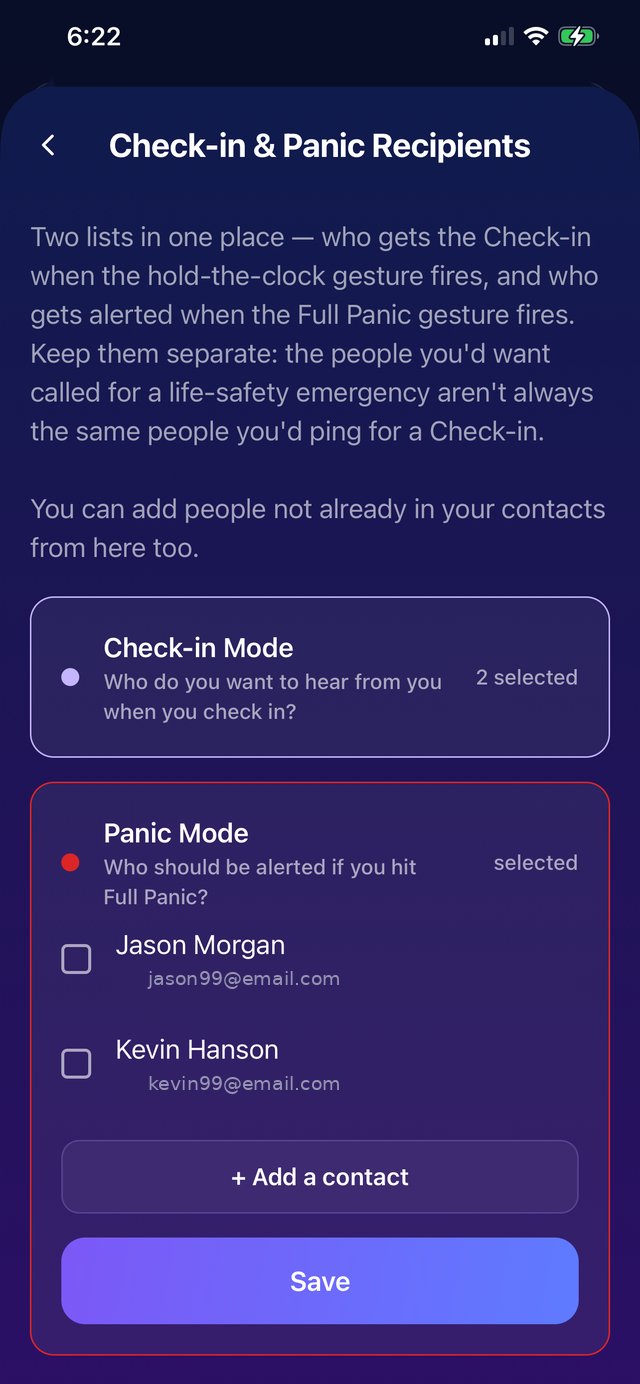
These are the people — or a Trusted Friend (Releasee) — your Panic release goes to.
Go to Settings → Safety → Panic recipients.
Add one or more recipients, and/or a Trusted Friend (Releasee) to route through.
Choose whether evidence goes to them directly or is routed through your Trusted Friend.
Save.
Note: Add at least one Panic recipient before you rely on Panic — otherwise there’s no one for a release to reach.
Pick your Panic list separately — the people you’d want in a life-safety emergency. (Example contacts shown.)
Set your Panic Phrase & Voice Recognition
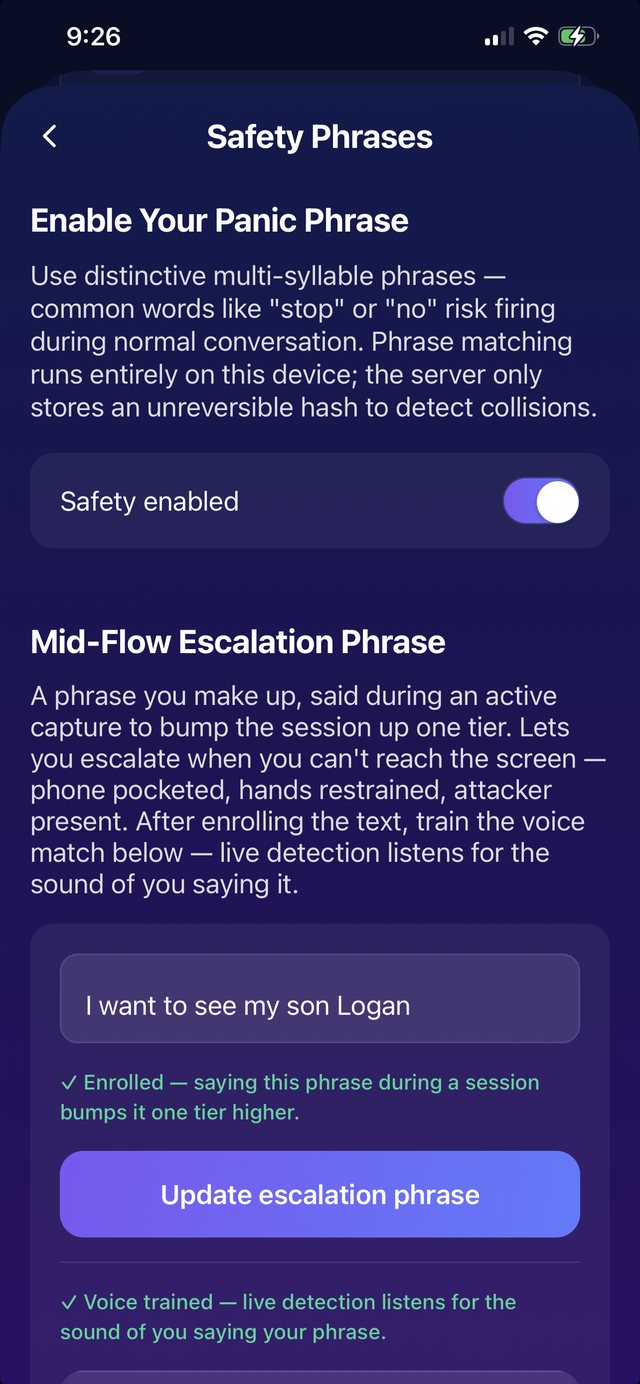
Your Panic Phrase triggers a release silently by voice — no need to touch your screen. Setting up a spoken Panic Phrase at all is optional; you can always trigger Panic from the on-screen button instead. But if you turn on Safety Phrases, set up the whole flow — the Panic Phrase, the Mid-Flow Escalation Phrase, and the Word Recognition plug-in aren’t separate a-la-carte options, they’re all part of one setup. Use a distinctive, multi-syllable phrase; common words like “stop” or “no” risk firing during normal conversation. Phrase matching runs entirely on your device — the server only ever stores an unreversible hash to detect collisions, never the phrase itself.
Go to Settings → Safety → Panic Phrase.
Turn on Safety enabled and record your Panic Phrase.
Set your Mid-Flow Escalation Phrase — a phrase you make up that bumps an active Check-in up to Panic when you can’t reach the screen (phone pocketed, hands restrained, someone standing over you). Enroll the text, then train the voice match.
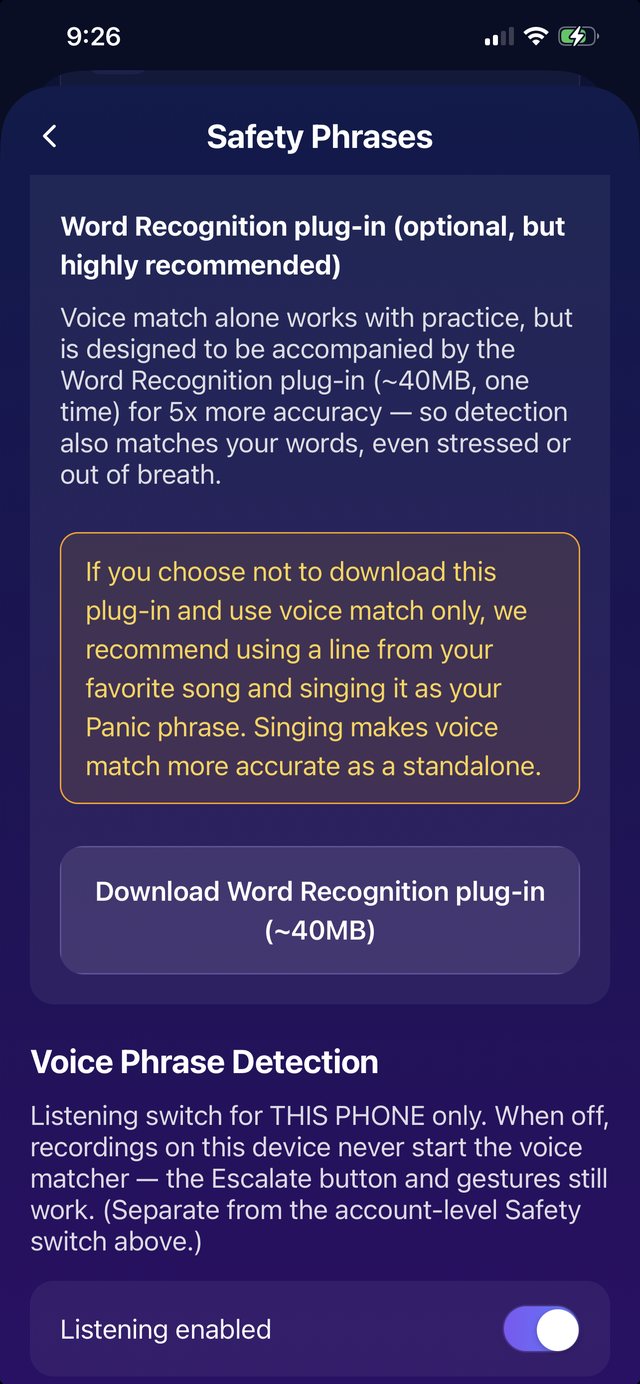
Download the Word Recognition plug-in (~40MB, one time) — it’s part of setup, not an extra, and keeps detection accurate even when you’re stressed or out of breath.
Test your phrase so you know it works.
Note: You can say your Panic Phrase during a Check-in to escalate to Panic without the person next to you knowing. Voice listening is a per-device switch, separate from your account-level Safety toggle, so you can turn it off on a shared or borrowed phone without disabling your Panic Phrase everywhere else.
Enroll your phrase, train the voice match, then add the Word Recognition plug-in for the most reliable detection.
Turn on Stealth Mode
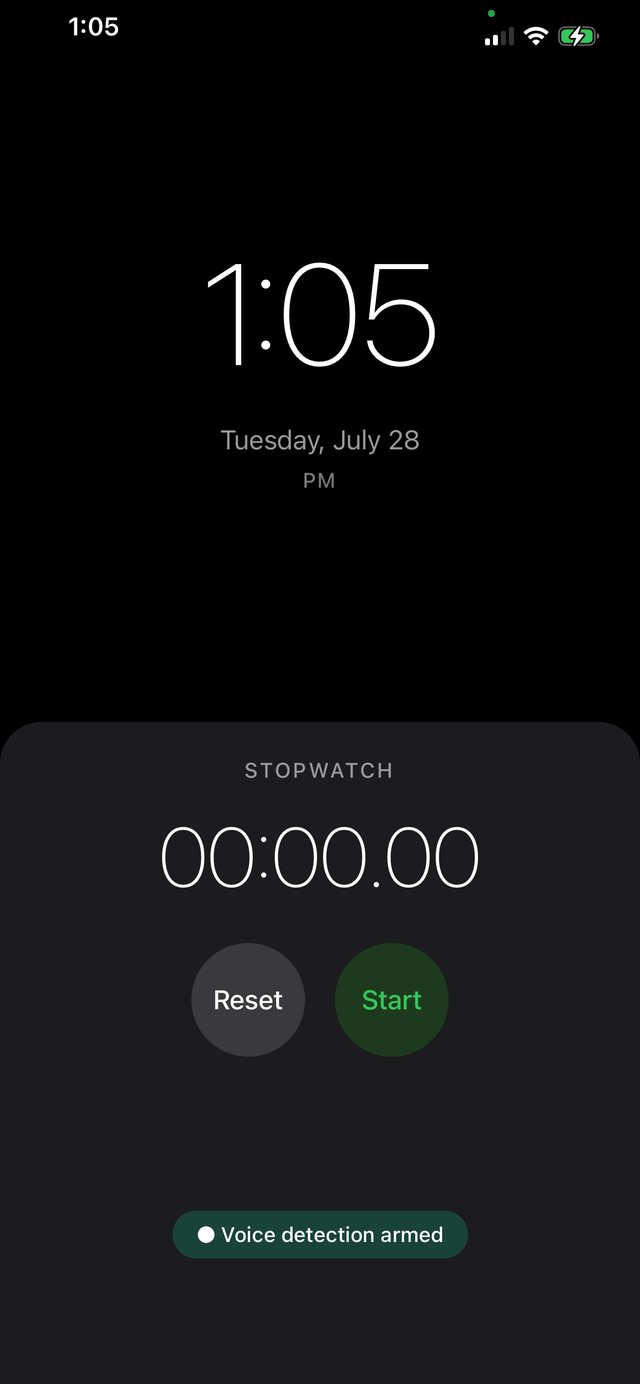
Stealth Mode disguises the app so someone flipping through your phone sees nothing that looks like a safety app. It covers live capture too, not just the app at rest — while a recording is running, the screen can show the working decoy clock, so a glance at your phone shows a clock face, not a viewfinder (see “Use Record”).
Go to Settings → Safety → Stealth Mode.
Choose your disguise. There are four cover styles: Clock (a working clock with a stopwatch), Dark (reads like a locked phone, swipe hint and all), My photo (mimics your real lock screen using a photo you pick — TRS keeps its own copy, so the disguise survives even if the original photo is later deleted), and Minimal dark (a bare, always-on-display look with no date or hints).
Learn the way back in: press and hold the top-right corner of the decoy for 5 seconds to open the real app. Deliberate enough that it never happens by accident — obscure enough that no one finds it by poking around.
Confirm. From then on, the app opens to the decoy, and evidence can route quietly to a lawyer, shelter, family member, or court.
Note: The same disguise also cloaks live capture — a Panic or Record in progress can hide behind it (you can even set a different cover style for Panic than for the app at rest). Practice the hold gestures a few times so they’re muscle memory under stress — see “Practice Stealth Mode” below, which outlines every hidden zone for you.
Screen recording coming soon
Enabling Stealth Mode, the four cover styles (Clock, Dark, My photo, Minimal dark), and the 5-second corner hold revealing the real app.
Practice Stealth Mode
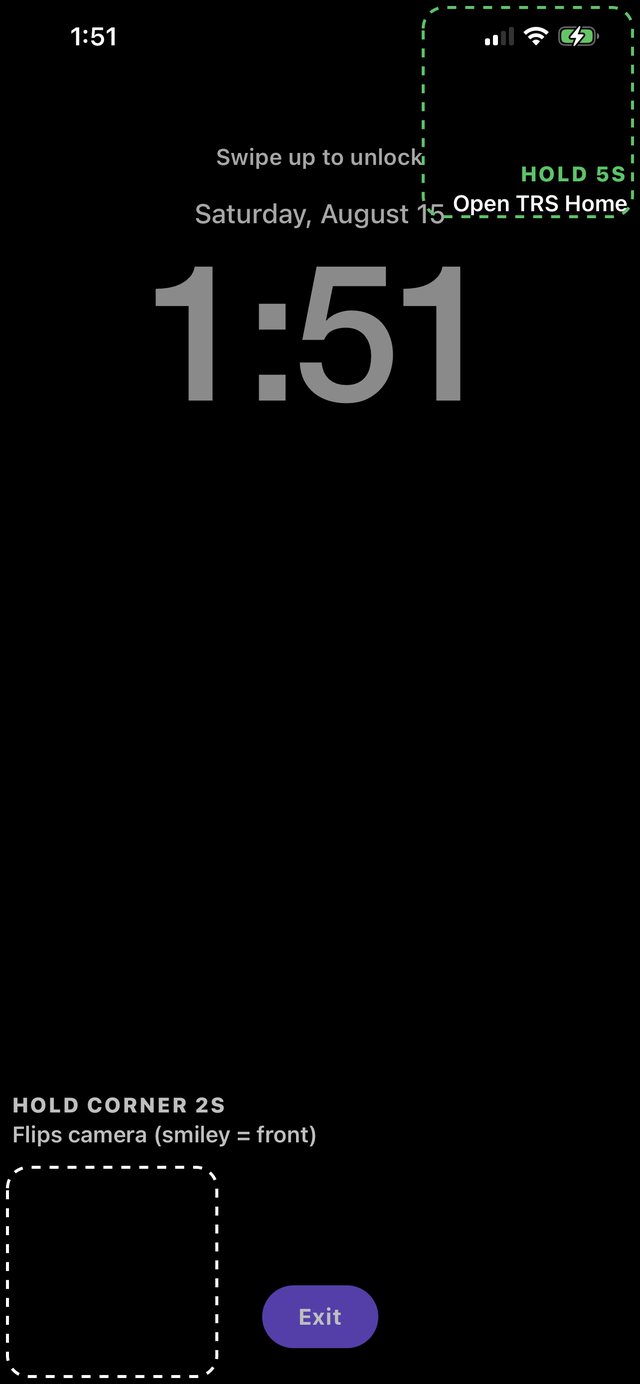
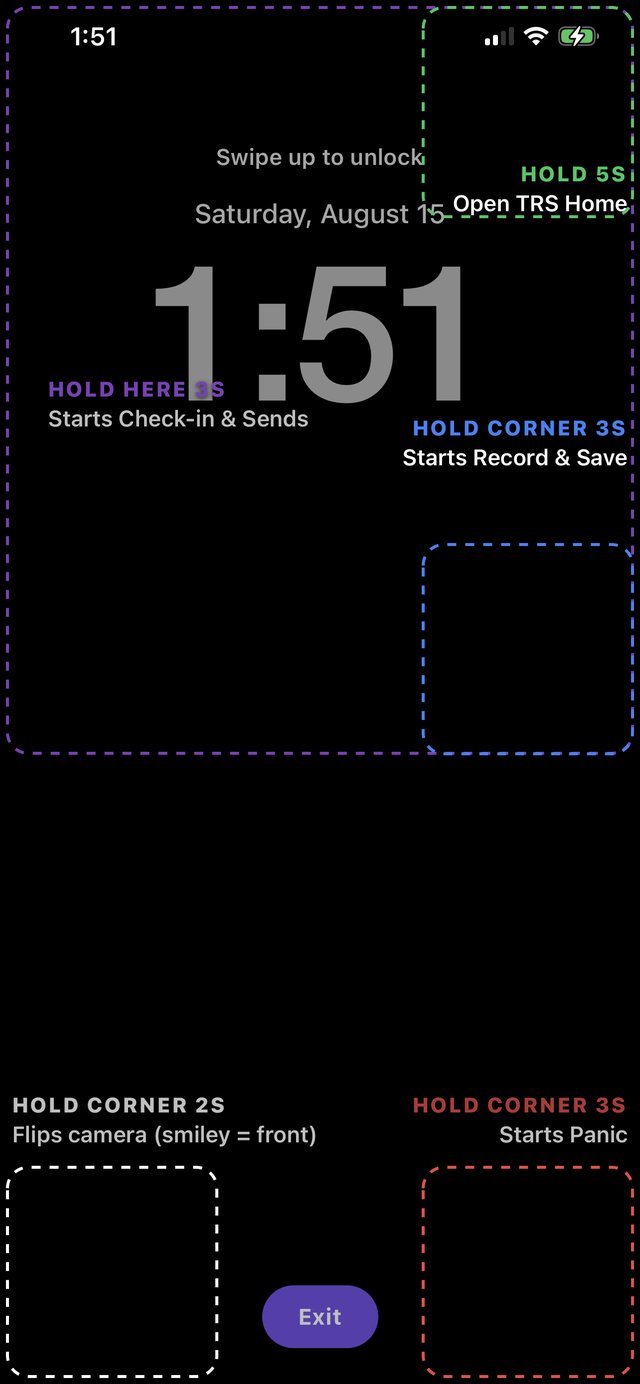
Stealth only protects you if the hidden gestures are muscle memory. Practice mode reveals them: every invisible hold zone on the decoy clock gets a dashed outline and a label, so you can rehearse each one until you can do it without looking.
Turn on Stealth Mode (Settings → Safety → Stealth Mode).
Tap Stealth Mode Practice.
The decoy clock appears with every gesture zone outlined. Hold each one and feel the timing — nothing fires for real in practice.
Tap Exit when you’re done. In real Stealth, the zones are completely invisible.
Practice mode outlines the hidden zones on the decoy clock — in real Stealth they’re invisible.
Stealth Escalation (the hidden gestures)
From the decoy clock, everything fires by holding an invisible zone — the screen never stops looking like a clock.
Hold the left side · 3s — starts a 30-second Check-in that sends itself to your circle (hold again to send early).
Hold the mid-right corner · 3s — starts a Record & Save (private, to your Vault).
Hold the bottom-right corner · 3s — starts a Panic.
Hold the bottom-left corner · 2s — flips the camera (smiley = front).
Hold the top-right corner · 5s — opens the real TRS Home (your way back in).
Note: Escalation works mid-stream, too: during any live Stealth capture, holding the Panic corner — or saying your Panic Phrase — escalates the same recording to a Panic without the screen ever unmasking. Success or failure, Stealth stays silent.
The full map: Check-in (left), Record & Save (mid-right), Panic (bottom-right), camera flip (bottom-left), TRS Home (top-right).
Practice safely (run a drill)
Rehearse the safety flow so it’s muscle memory — without alarming anyone.
Go to Settings → Safety → Practice mode (or “Test”).
Run a Check-in and a Panic drill that notifies only you.
Confirm the recording captures and the release preview looks right.
Exit practice mode when you’re confident.
Note: Always run your first Panic in practice mode, so you know the exact flow before a real emergency.
Screen recording coming soon
Running a practice drill end-to-end, showing the “this is a test” state so no real alerts go out.
3
Using the three buttons
Check-in, Record, and Panic — the whole safety surface.
Use Check-in
Use Check-in when something just feels off — a ride taking a wrong turn, a first date, a quiet parking garage.
Tap Check-in on the home screen.
A 30-second recording is captured and sent to your Check-in recipients automatically, along with your location — a moment in time, not a location beacon that never turns off. Mis-tap? You have a 5-second window to cancel; after that it runs to the end and sends — by design, a struggle for the phone can’t stop it.
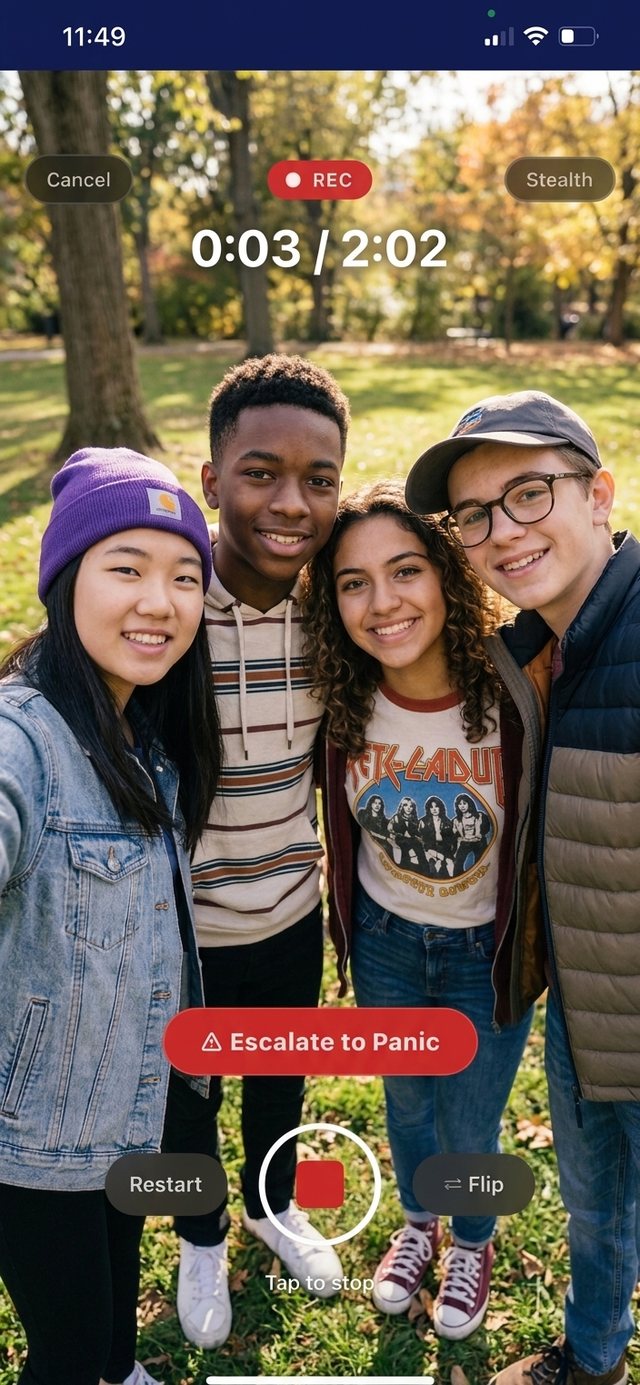
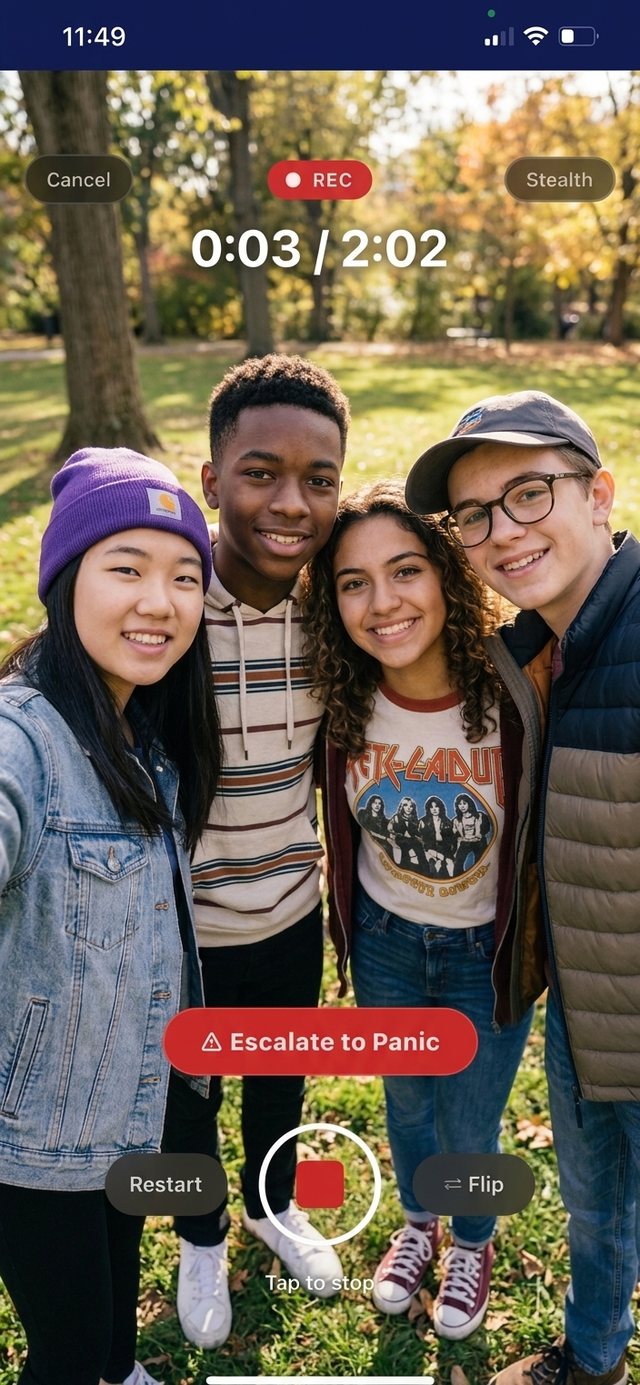
If things turn while it’s recording, escalate to a Panic — tap Escalate on the recording screen, or say your Panic Phrase (if you set one up in advance). The same recording keeps rolling, and the full Panic response takes over without missing a second.
Someone watching? Tap Stealth on the recording screen and the display becomes the working clock — the Check-in finishes and sends itself underneath, and the clock stays up until you hold the top-right corner for 2 seconds to return.
Once it’s sent, you’re done — nothing keeps running, and a sealed copy stays in your Vault.
In Stealth Mode: Check-in fires from the decoy clock the same way (hold the left side for 3 seconds) and records the same 30 seconds — then it sends itself. One gesture, then put the phone down: no second touch needed. Hold the same zone again to send early.
Tap Check-in and it records (left); your circle gets a card the moment it sends (right).
Use Record
Record starts an encrypted, evidence-grade recording that saves to your Vault. It’s also for when you don’t feel safe yet: start a recording — and if it stops being a feeling, escalate to a Panic without missing a second.
Tap Record on the home screen — or say “Hey Siri, start a recording with Time Release Safes” (“Hey Google” on Android).
TRS captures video, audio, time and location, encrypted on your device as it records.
Need more than a recording? Mid-recording, escalate to a Panic — tap Escalate on the recording screen, or say your Panic Phrase (if you set one up in advance). The same recording keeps rolling, and everything captured is released to your Panic recipients.
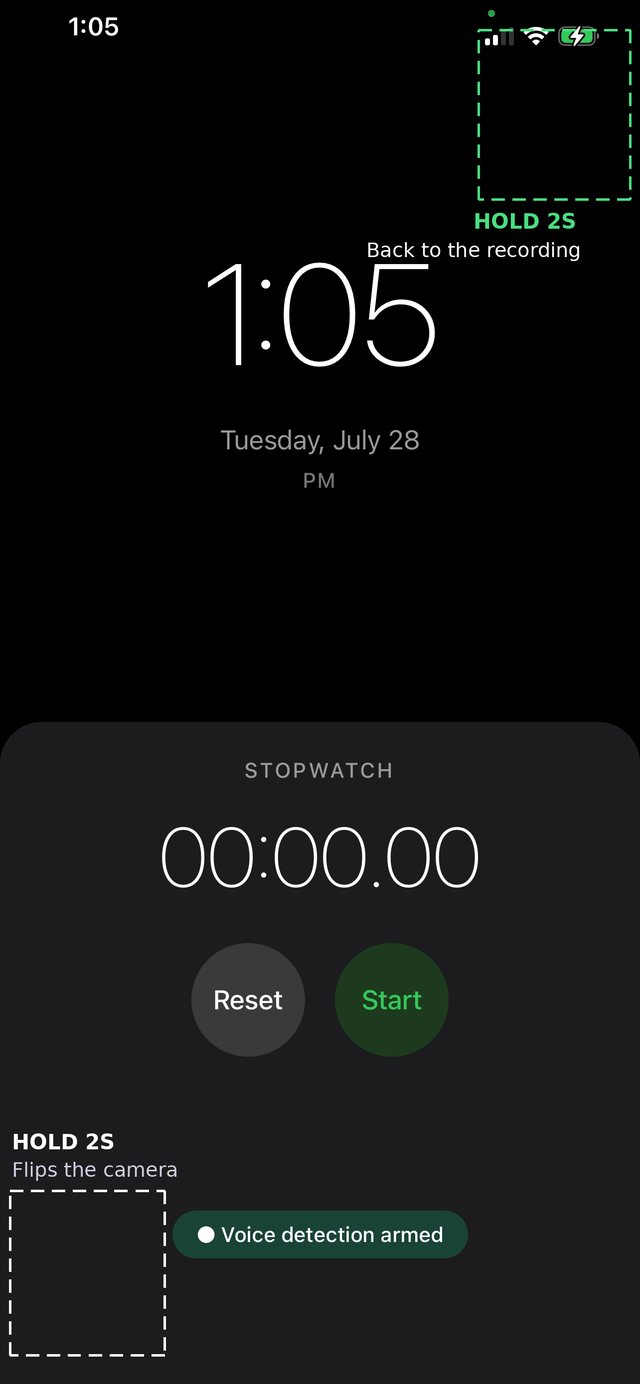
Someone watching? Tap Stealth on the recording screen and the display becomes a working clock — a glance at your phone shows a stopwatch, not a camera — while the recording keeps going underneath. (iOS still shows the green camera dot, as Apple requires.)
The clock has two invisible hold zones. Press and hold the bottom-left corner for 2 seconds to flip between the front and back cameras without leaving the clock — the corner flashes briefly to confirm. Press and hold the top-right corner for 2 seconds to exit the clock and return to the recording view. Each time the clock engages, a faint reminder fades in for a few seconds so you know where the exit is.
Tap stop to end. The recording stays sealed in your Vault, under your control.
A live recording — Stealth cloaks it, Escalate turns it into a Panic.
The cloak’s two hold zones (left) — and what anyone glancing at your phone actually sees (right).
Use Panic
Panic is for when it isn’t a feeling anymore.
Trigger Panic (tap and confirm, or use your Panic Phrase).
Your designated Safe releases to the people you named — directly or through a Trusted Friend.
Your encryption keys wipe from the phone, so whoever takes it can’t open your accounts or delete the evidence.
Note: Practice once in a safe setting (see “Practice safely” above) so it becomes muscle memory.
Screen recording coming soon
The full Panic flow: trigger → capture starts → release confirmation → key-wipe. This one really benefits from a recording.
Start a recording with Siri
Add the shortcut in Settings → Siri (or the iOS Shortcuts app).
Then say: “Hey Siri, start a recording with Time Release Safes.”
Note: By design, only the recording phrase is wired to Siri — not Panic — to avoid accidental triggers in crowded places.
Screenshot coming soon
The Siri / Shortcuts settings screen showing the “Start a recording” shortcut.
4
Safes: create, store & release
Seal anything in an encrypted Safe and control exactly when it opens.
Create a Safe
A Safe is an encrypted container. It can hold a message, a file, a photo, a video, or a lifetime of documents.
Open the menu and tap Safes → New Safe.
Add your content: a message, files, photos, video, or documents.
Give the Safe a name so you can find it later.
Screen recording coming soon
Creating a Safe from scratch and adding a file.
Add recipients to a Safe
Open the Safe and tap Recipients.
Add people by email or phone number.
Recipients are not notified until the Safe is released.
Screenshot coming soon
The Recipients screen for a Safe.
Choose a release trigger
A trigger decides when a Safe releases. Use one or combine several — the first to occur wins.
Releasee — a trusted person fires it on your behalf.
Quorum — several trusted contacts must agree (e.g., 2 of 3).
Scheduled date — releases on a date you set.
Inactivity — releases if you go quiet past a threshold.
Manual — you fire it yourself.
Never — a personal Safe that stays sealed.
Screenshot coming soon
The trigger-selection screen.
Cancel during the Pending Release window
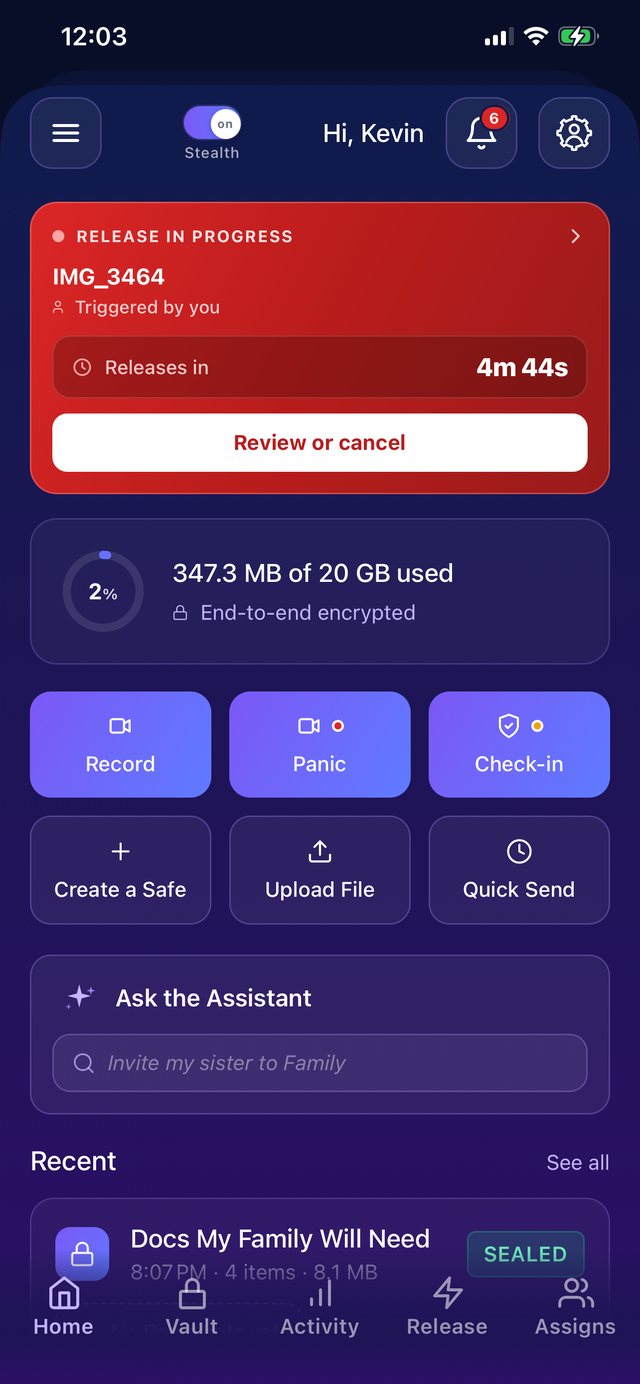
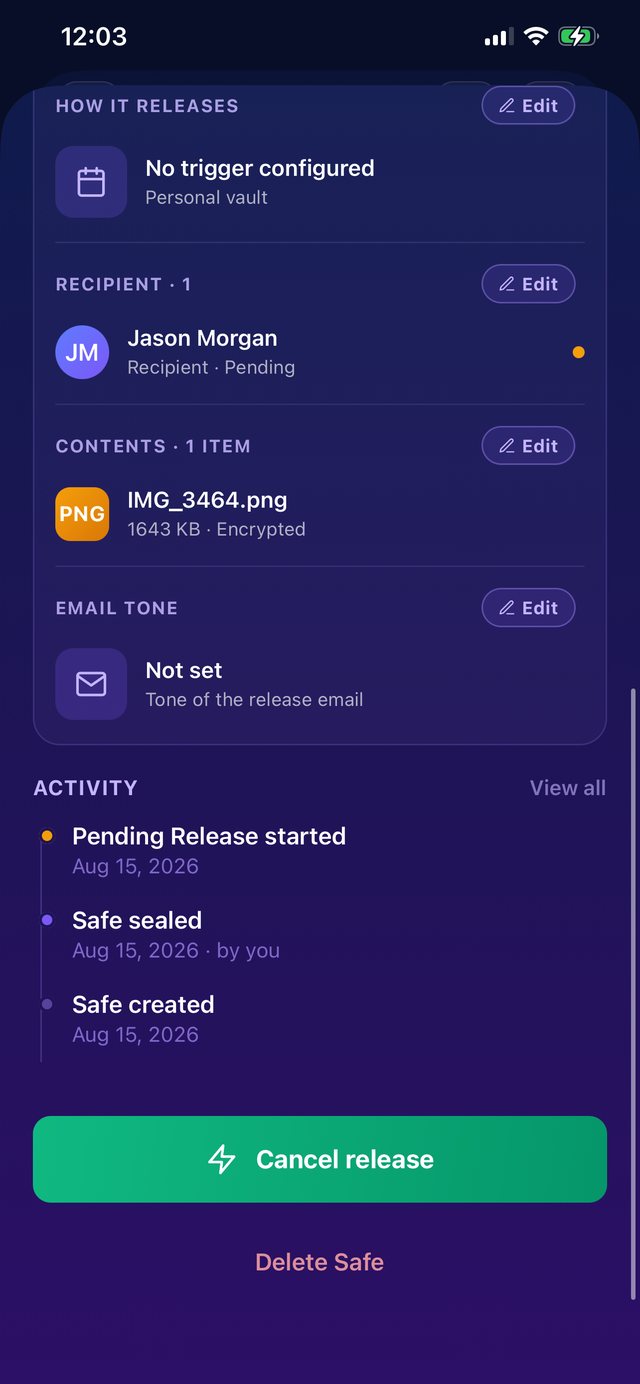
Every release has a cooling-off window (24 hours by default) so a mistake can’t cause an instant, irreversible delivery.
When a release fires, you’re notified on every channel you’ve enabled.
Open the alert and tap Cancel release before the window closes.
After it closes, delivery is final — the app tells you exactly when.
A pending release counts down on your home screen and on the Safe — cancel from either place. (Example contact shown.)
Store important documents
Keep the paperwork a fire, flood, or theft could erase — license, passport, birth certificate, insurance — encrypted and reachable from any device.
Create a New Safe and add scans or photos of each document.
Set it to Never (personal) or assign a Recipient.
After account recovery, open it from any device.
Screenshot coming soon
A document Safe holding example items (use redacted or dummy documents).
Use Quick Send
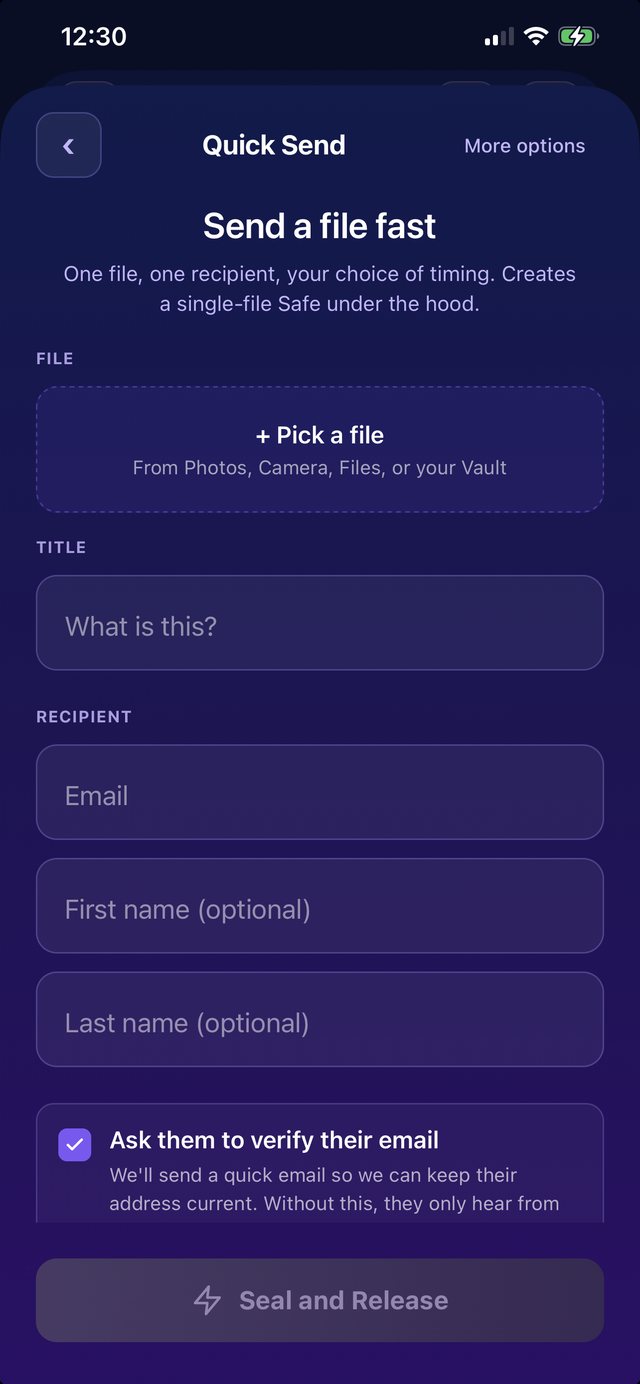
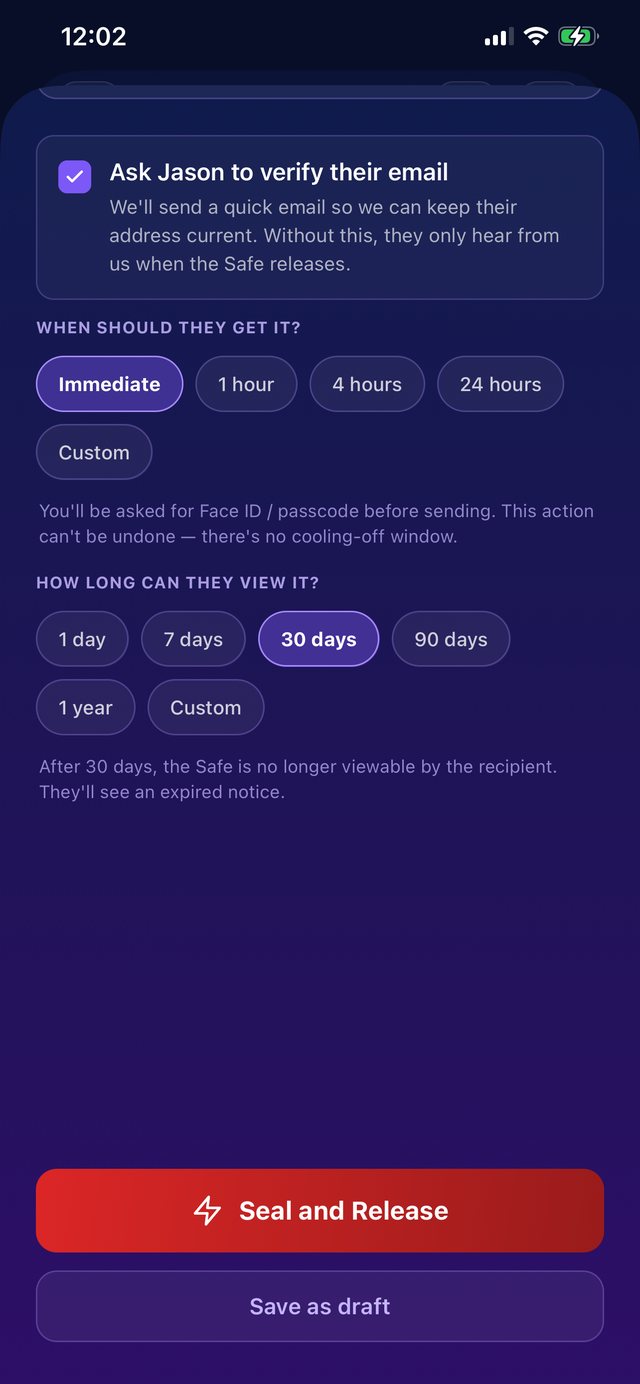
Quick Send is the fast path: one file, one recipient, your choice of timing. It creates a single-file Safe under the hood — same encryption, same delivery — without the full Safe wizard.
Tap Quick Send on the home screen.
Pick a file (Photos, Camera, Files, or your Vault), give it a title, and enter your recipient’s email.
Choose when they get it (immediately, or on a delay) and how long they can view it.
Tap Seal and Release. You’ll confirm with Face ID — an immediate send can’t be undone, while delayed sends can still be cancelled from the Safe before they fire.
One file, one recipient — pick the timing and the viewing window, then Seal and Release.
5
Your trusted circle
Releasees, Quorums, and Recipients — the people around a Safe.
Add a Releasee (Trusted Friend)
A Releasee can fire your releases — but never sees what’s inside (only a count of Safes).
Open Circle → Releasees and send an invite.
Once they accept, they can fire the releases you authorized.
They never see Safe names, contents, or recipients.
Screenshot coming soon
The Releasee invite screen.
Set up a Quorum
Use a Quorum when no single person should fire a release alone.
Open Circle → Quorum.
Choose contacts and a threshold (e.g., “2 of 3 must agree”).
The Safe releases only once enough vote yes — and the Pending Release window still applies.
Screenshot coming soon
The Quorum setup screen.
Add & manage Recipients
Open Circle → Recipients.
Add or remove people, and assign them to specific Safes.
Screenshot coming soon
The Recipients management list.
What a recipient receives
A recipient does nothing until a Safe is released to them.
They get a link when a Safe releases.
They verify their email and create a quick account (about 30 seconds).
They open only the Safe(s) addressed to them.
Screen recording coming soon
The recipient claim flow: link → verify → open the Safe.
6
Account, security & recovery
Encryption, Designees, recovery, billing, and deletion.
How your encryption works
Your content is encrypted on your device before it ever leaves your phone (XChaCha20-Poly1305, end-to-end). TRS stores only ciphertext — we can’t read your Safes, and neither can anyone who breaches us.
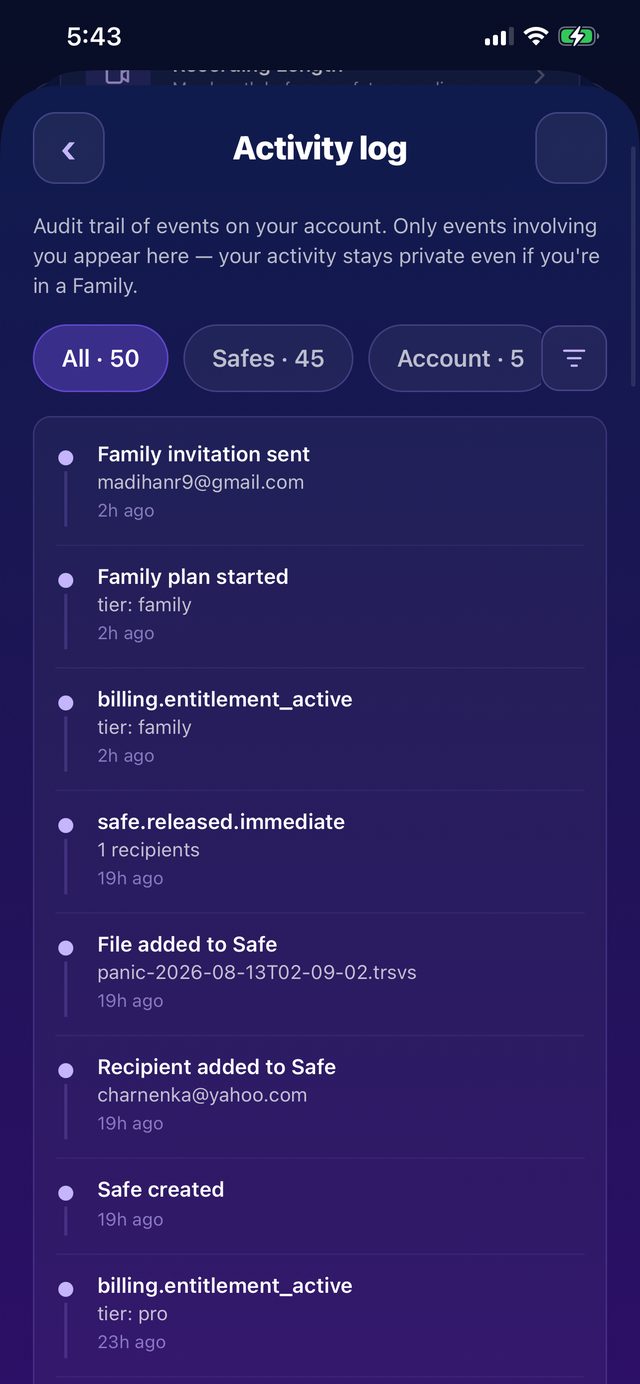
Every event on your account — sign-ins, releases, invitations — is written to a private audit trail only you can see: Settings → Activity Log.
Your private audit trail — if anything ever happens on your account, it’s recorded here.
Set up Recoverees (recovery helpers)
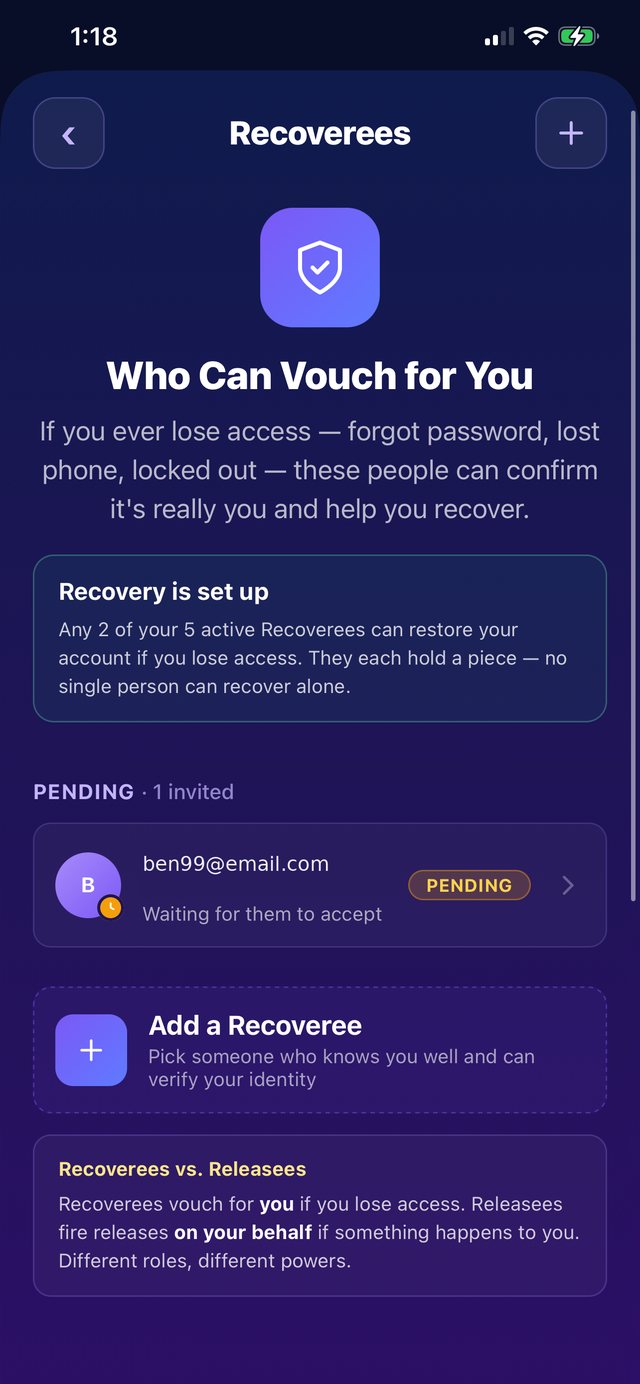
Recoverees are the people who can vouch for you if you ever lose access — forgot password, lost phone, locked out. They confirm it’s really you and help you recover.
Go to Settings → Trust circle → Recoverees.
Add people who know you well and can verify your identity.
Any 2 of your 5 active Recoverees can restore your account. Each holds a piece — no single person can recover alone.
Note: Recoverees vouch for you if you lose access. Releasees fire releases on your behalf if something happens to you. Different roles, different powers.
Recovery set up: any 2 of 5 Recoverees can restore your account. (Example contact shown.)
Recover your account on a new device
Install TRS on the new device and tap Sign in.
Choose Recover / first time on this device.
Enter your Recovery Phrase, or start Designee recovery.
Verify, and your encryption keys are restored.
Two ways back in: your Recoverees vouch for you (2 of 5 must approve), or your 24-word recovery key restores access directly. (Sample words and contact shown.)
Manage your subscription
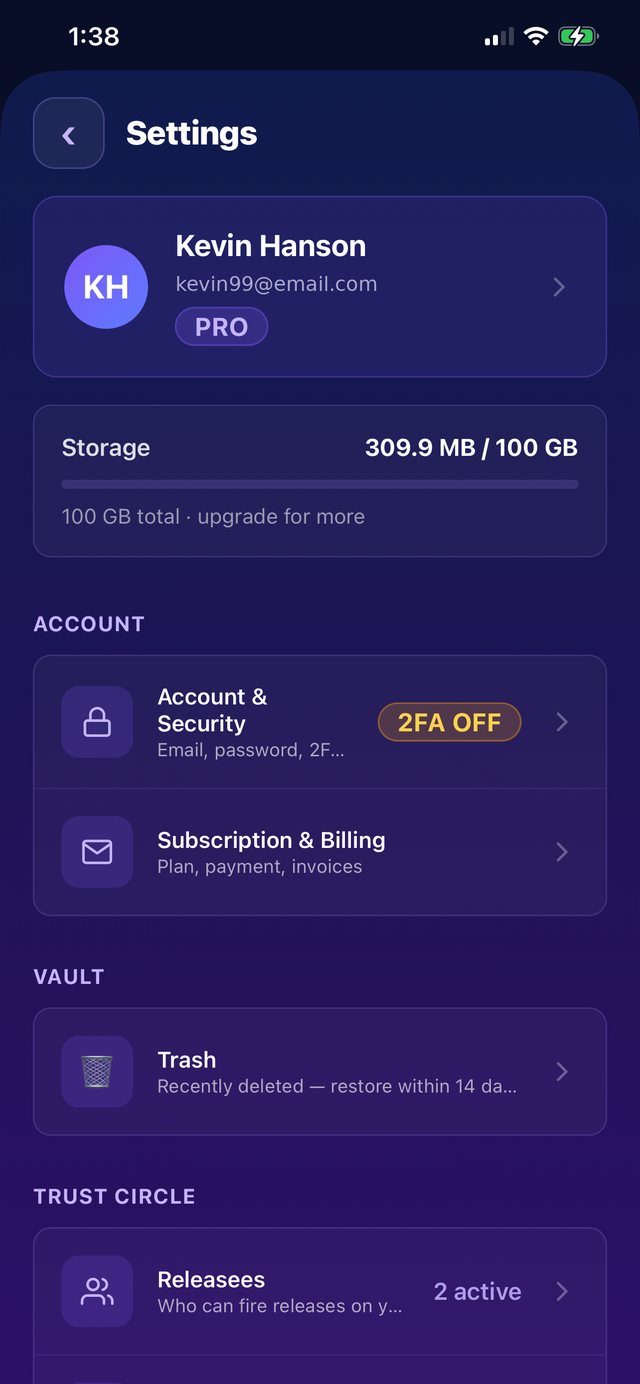
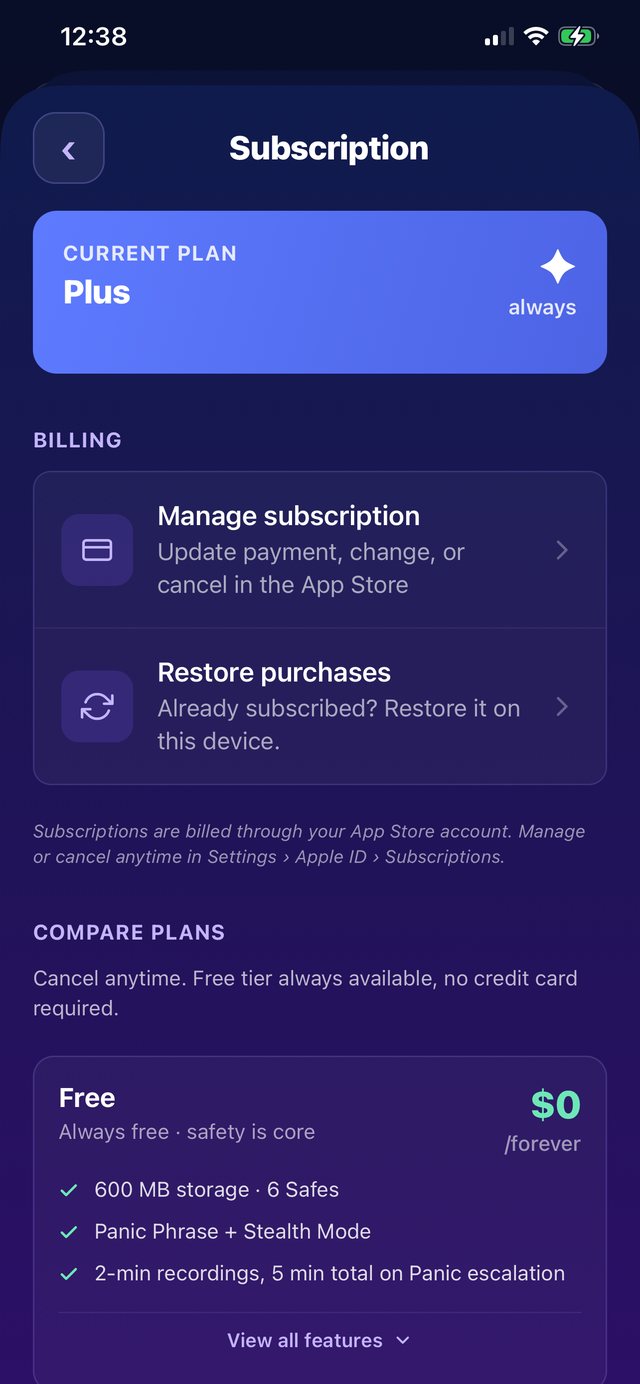
The Free tier is included — safety is core. Plus adds storage and unlimited Safes, Pro adds 100 GB and longer recordings for field work, and Family covers up to five accounts under one bill. Founding Members get 50% off, locked for two years after our first SOC 2 audit.
Go to Settings → Subscription & Billing.
Choose or change your plan (billed through the App Store or Google Play).
Your plan badge lives on the Settings account card; tap Subscription & Billing to compare or change plans.
Set up the Family plan
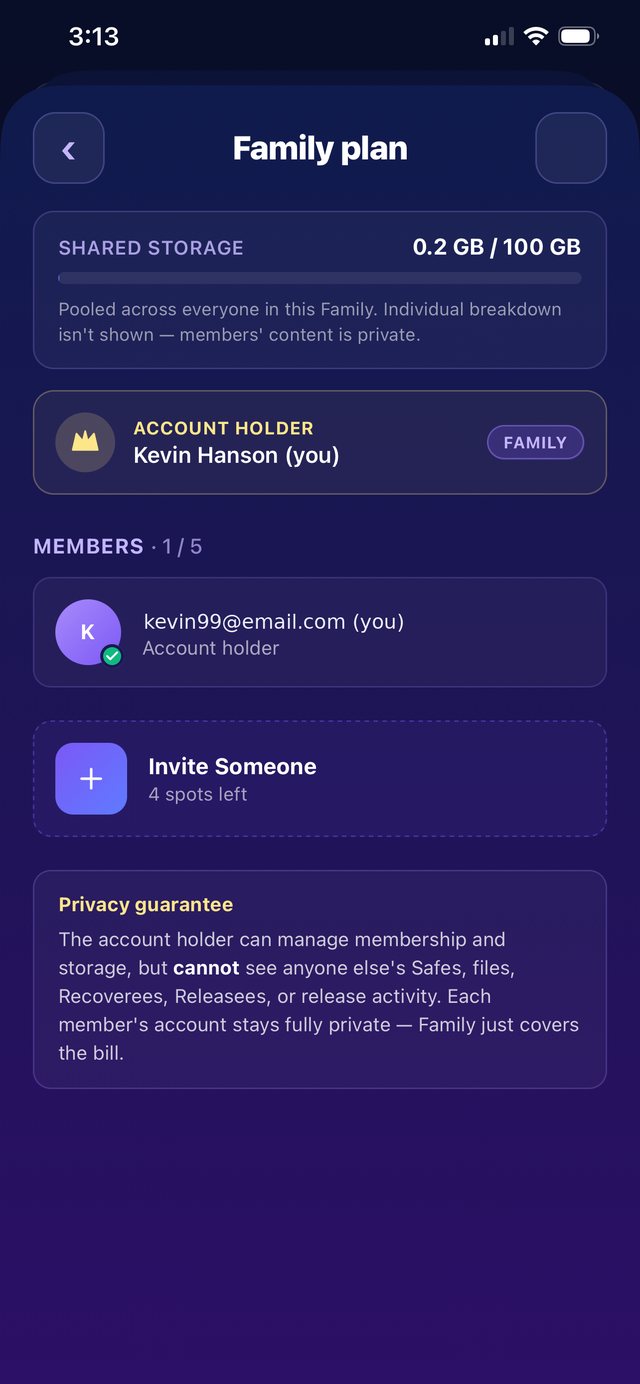
Family covers up to five accounts under one bill, sharing a 100 GB storage pool. Every member keeps their own private account — their Safes, contacts, keys, and activity stay theirs alone. The account holder pays the bill and manages membership, but can never see anyone else’s content.
Upgrade to Family under Settings → Subscription & Billing.
Open Settings → Family plan to see your roster and the shared storage pool.
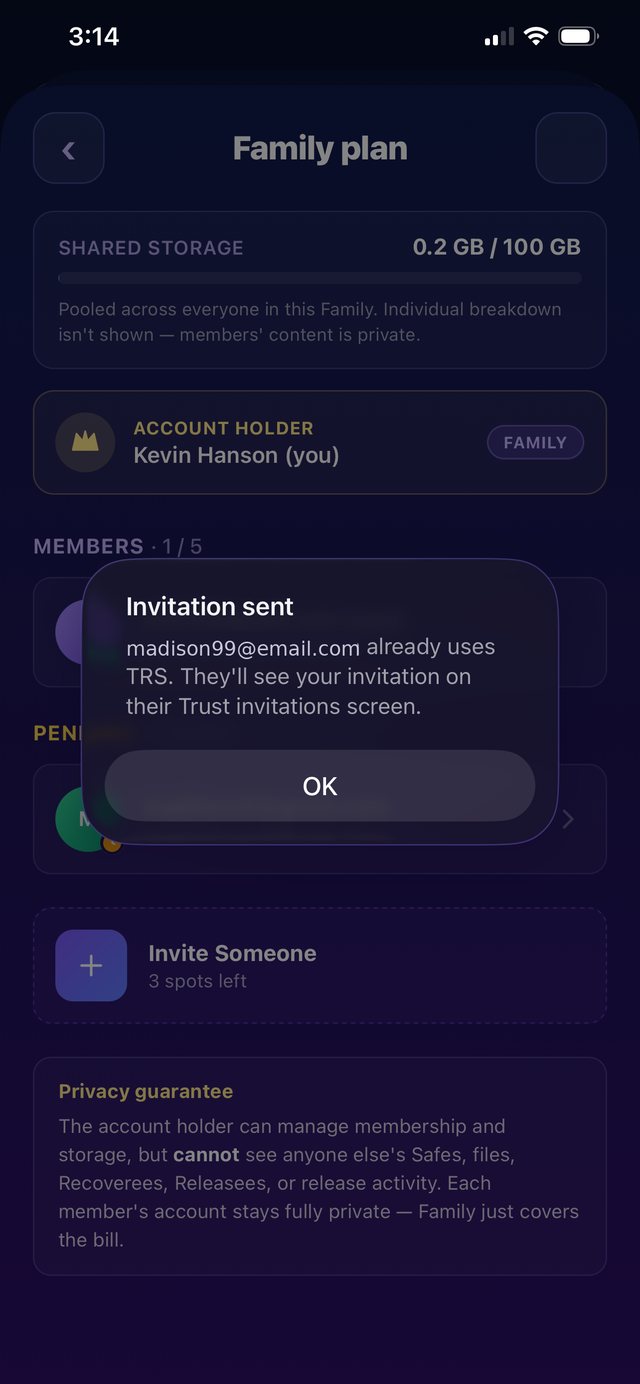
Tap Invite Someone and enter their email. If they already use TRS, the invite lands on their Trust invitations screen; if not, they get an email to join.
Each member sets up their own recovery phrase, recipients, and safety features — Family shares the bill, not the data.
The Family roster with the shared pool and privacy guarantee — invites reach existing TRS users in-app. (Example emails shown.)
Delete your account
Deletion is never instant — by design. A forced or panicked deletion shouldn’t be able to destroy your evidence in one tap, so every permanent delete goes through an email confirmation and a 48-hour hold you can cancel at any point.
Go to Settings, scroll to the Danger Zone, and tap Delete account permanently. (Locked out? Use our account deletion page instead — same process.)
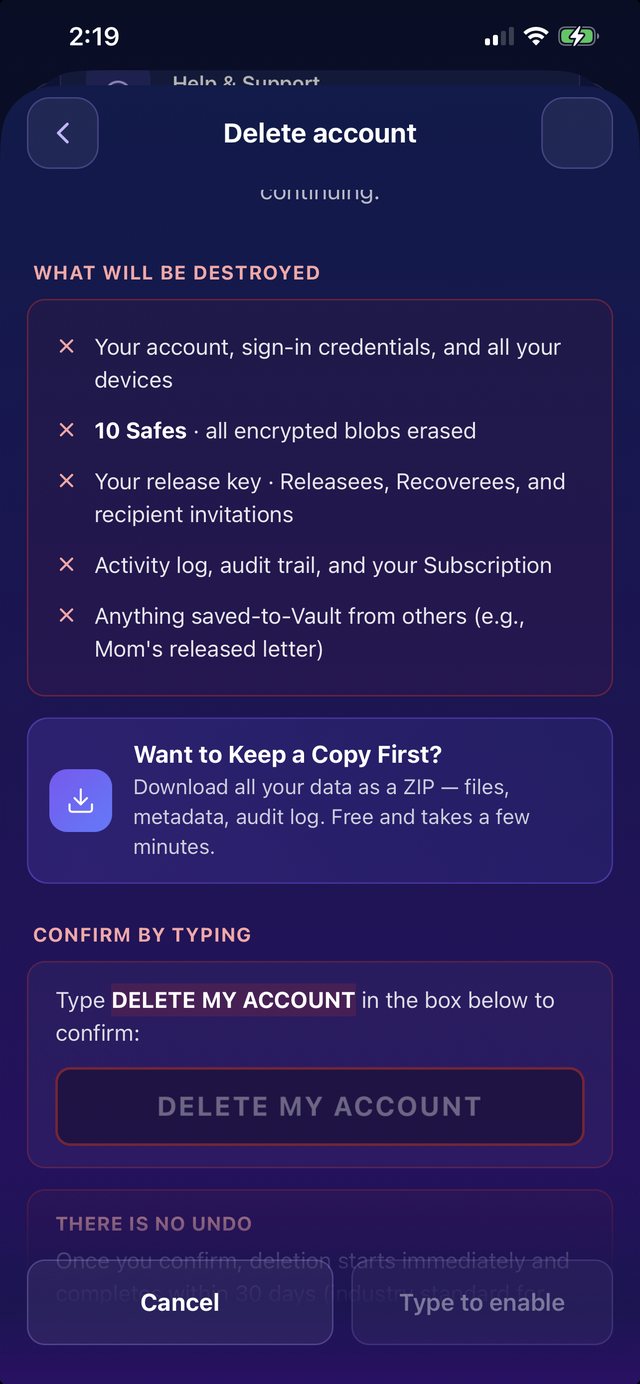
The delete screen shows you exactly what will be destroyed — and offers to export everything first as a ZIP (files, metadata, audit log; free). To proceed, you must type DELETE MY ACCOUNT — the button stays disabled until the words are typed.
We email a confirmation link to your address. Nothing happens until you tap it.
Confirming starts a 48-hour hold. We remind you every 8 hours, and you can cancel any time — from the link in those emails or just by signing back into the app.
Only after the hold ends with no cancel is the account deleted: your Safes, files, keys, and metadata are permanently erased (zeroed out within 30 days). Because everything is end-to-end encrypted, there is no backup we could restore it from.
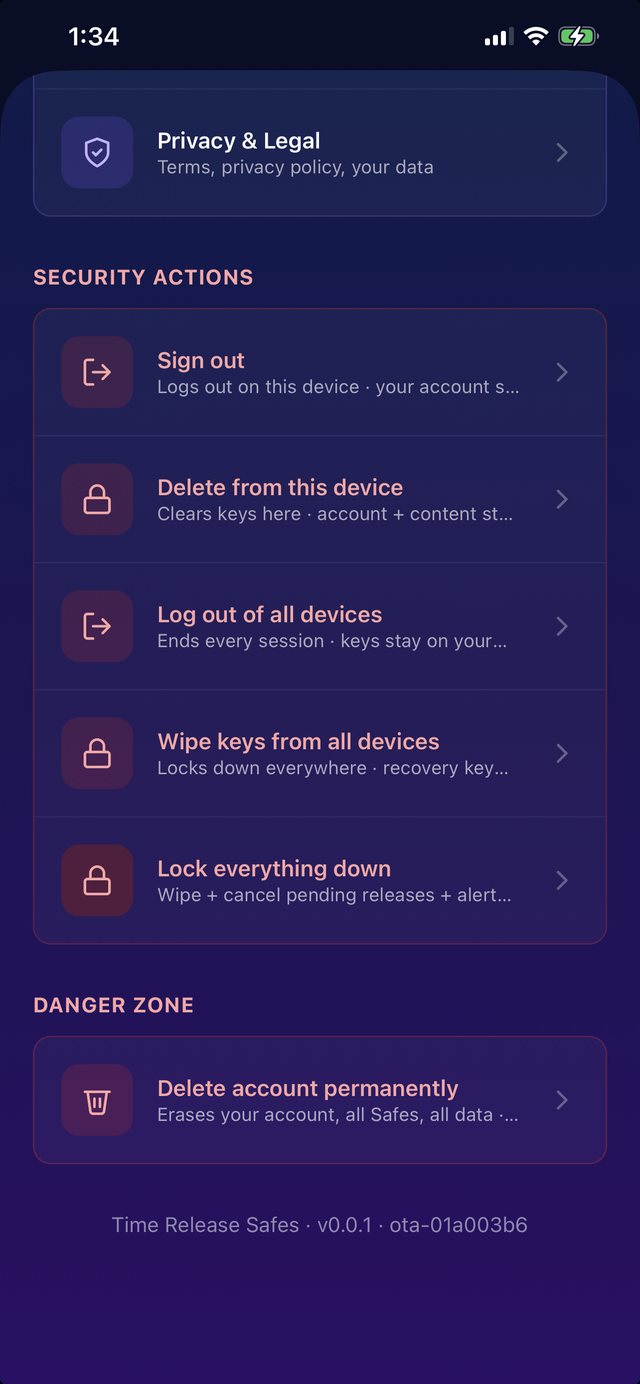
Note: Deleting your account is the biggest hammer — Settings → Security Actions has smaller ones that don’t cost you your data: Sign out (this device only), Delete from this device (clears keys here; account and content stay safe), Log out of all devices, Wipe keys from all devices (locks down everywhere; your recovery key gets you back in), and Lock everything down (wipe + cancel pending releases + alert your circle). If you’re reaching for delete out of immediate fear, one of these may protect you better. Every action here except Sign out requires its own typed confirmation — so none of them can fire from an accidental (or forced) tap.
Graduated Security Actions (left); the delete screen itself (right) — what gets destroyed, a keep-a-copy export, and the typed confirmation that arms the button.
7
Troubleshooting
Quick answers to the most common snags.
Panic or Record didn’t capture video or audio.
Check permissions first: Settings → Permissions must allow Camera and Microphone. If either is off, capture can’t record. See “Grant app permissions” in Section 2.
I’m not getting notifications.
Open your phone’s Settings → Notifications → Time Release Safes and allow alerts. Release and check-in alerts rely on notification permission being on.
Sign-in on a new device isn’t working.
The new-device screen is for recovery, not a normal login. Choose Recover / first time on this device and enter your Recovery Phrase, or start Designee recovery (Section 6).
I missed an inactivity check-in but I’m fine.
You’re protected: your Releasees are contacted first, before any release fires, plus a cooling-off window. Just open the app to clear the check-in.
My recipient says they didn’t get the release.
Ask them to check spam for the verification link — they must verify their email to open a released Safe. You can also set a fallback recipient.